Difference between revisions of "The Elder Sibling"
Jump to navigation
Jump to search
m |
|||
| Line 211: | Line 211: | ||
|{{Icon|Black Spawn War Orb (Defense)}} | |{{Icon|Black Spawn War Orb (Defense)}} | ||
|{{Icon|Black Spawn War Orb (Offense)}} | |{{Icon|Black Spawn War Orb (Offense)}} | ||
| − | |{{Icons| | + | |{{Icons|Black Spawn War Orb (Defense, Imbued) |
| + | |Black Spawn War Orb (Offense, Imbued)}} | ||
|- | |- | ||
|{{Icon Link|Virindi Void Orb}} | |{{Icon Link|Virindi Void Orb}} | ||
| Line 217: | Line 218: | ||
|{{Icon|Black Spawn Void Orb (Defense)}} | |{{Icon|Black Spawn Void Orb (Defense)}} | ||
|{{Icon|Black Spawn Void Orb (Offense)}} | |{{Icon|Black Spawn Void Orb (Offense)}} | ||
| − | |{{Icons| | + | |{{Icons|Black Spawn Void Orb (Defense, Imbued) |
| + | |Black Spawn Void Orb (Offense, Imbued)}} | ||
|- | |- | ||
!rowspan=3|[[Missile Weapons]] | !rowspan=3|[[Missile Weapons]] | ||
| Line 224: | Line 226: | ||
|{{Icon|Black Spawn Bow (Defense)}} | |{{Icon|Black Spawn Bow (Defense)}} | ||
|{{Icon|Black Spawn Bow (Offense)}} | |{{Icon|Black Spawn Bow (Offense)}} | ||
| − | |{{Icons| | + | |{{Icons|Black Spawn Bow (Defense, Imbued)|Black Spawn Bow (Offense, Imbued)}} |
|- | |- | ||
|{{Icon Link|Virindi Crossbow}} | |{{Icon Link|Virindi Crossbow}} | ||
| Line 230: | Line 232: | ||
|{{Icon|Black Spawn Crossbow (Defense)}} | |{{Icon|Black Spawn Crossbow (Defense)}} | ||
|{{Icon|Black Spawn Crossbow (Offense)}} | |{{Icon|Black Spawn Crossbow (Offense)}} | ||
| − | |{{Icons| | + | |{{Icons|Black Spawn Crossbow (Defense, Imbued)|Black Spawn Crossbow (Offense, Imbued)}} |
|- | |- | ||
|{{Icon Link|Virindi Atlatl}} | |{{Icon Link|Virindi Atlatl}} | ||
| Line 236: | Line 238: | ||
|{{Icon|Black Spawn Atlatl (Defense)}} | |{{Icon|Black Spawn Atlatl (Defense)}} | ||
|{{Icon|Black Spawn Atlatl (Offense)}} | |{{Icon|Black Spawn Atlatl (Offense)}} | ||
| − | |{{Icons| | + | |{{Icons|Black Spawn Atlatl (Defense, Imbued)|Black Spawn Atlatl (Offense, Imbued)}} |
|- | |- | ||
!rowspan=1|[[Two Handed Combat]] | !rowspan=1|[[Two Handed Combat]] | ||
|{{Icon Link|Virindi Greatsword}} | |{{Icon Link|Virindi Greatsword}} | ||
| − | |{{Icon| | + | |{{Icon|Black Spawn Greatsword}} |
| − | |{{Icon| | + | |{{Icon|Black Spawn Greatsword (Defense)}} |
| − | |{{Icon| | + | |{{Icon|Black Spawn Greatsword (Offense)}} |
| − | |{{Icons| | + | |{{Icons|Black Spawn Greatsword (Defense, Imbued)|Black Spawn Greatsword (Offense, Imbued)}} |
|- | |- | ||
!rowspan=1|[[Heavy Weapons]] | !rowspan=1|[[Heavy Weapons]] | ||
| Line 250: | Line 252: | ||
|{{Icon|Black Spawn Sword (Defense)}} | |{{Icon|Black Spawn Sword (Defense)}} | ||
|{{Icon|Black Spawn Sword (Offense)}} | |{{Icon|Black Spawn Sword (Offense)}} | ||
| − | |{{Icons| | + | |{{Icons|Black Spawn Sword (Defense, Imbued)|Black Spawn Sword (Offense, Imbued)}} |
|- | |- | ||
!rowspan=1|[[Light Weapons]] | !rowspan=1|[[Light Weapons]] | ||
| Line 257: | Line 259: | ||
|{{Icon|Black Spawn Spear (Defense)}} | |{{Icon|Black Spawn Spear (Defense)}} | ||
|{{Icon|Black Spawn Spear (Offense)}} | |{{Icon|Black Spawn Spear (Offense)}} | ||
| − | |{{Icons| | + | |{{Icons|Black Spawn Spear (Defense, Imbued)|Black Spawn Spear (Offense, Imbued)}} |
|- | |- | ||
!rowspan=1|[[Finesse Weapons]] | !rowspan=1|[[Finesse Weapons]] | ||
| Line 264: | Line 266: | ||
|{{Icon|Black Spawn Dagger (Defense)}} | |{{Icon|Black Spawn Dagger (Defense)}} | ||
|{{Icon|Black Spawn Dagger (Offense)}} | |{{Icon|Black Spawn Dagger (Offense)}} | ||
| − | |{{Icons| | + | |{{Icons|Black Spawn Dagger (Defense, Imbued)|Black Spawn Dagger (Offense, Imbued)}} |
|} | |} | ||
Revision as of 13:21, 14 June 2021
| Custom Content This page is for custom content on Levistras. |
| Introduced: | Familiar Foes | Related Quests: | To Seek Hearth |
| Walkthrough & Notes Dungeons & Maps Rewards Images Dialog Update History |
| The Elder Sibling | |
|---|---|
| Required Level: | 180 |
| Recommended Level: | 225+ |
| Type: | Fellowship |
| Starts With: | Akamine Jiro |
| Starts At: | Wai Jhou |
| Repeat: | 20 hours |
| Quest Chain: | 1. To Seek Hearth 2. The Elder Sibling |
Overview
- The first major segment of The Hearthseekers questline.
- Volatile Pyreals obtained from the dungeon can be spent at Rimgar Ethsun.
- 100 Volatile Pyreals can be upgraded per week to Glowing Volatile Pyreals, by using the Iron Furnace in Eastham.
- Glowing Volatile Pyreals can be spent at Takemoto Sora.
Walkthrough & Notes
- Talk to Akamine Jiro in Wai Jhou to obtain a Field Theodolite and become flagged to enter Black Spawn Den (Uber).
- Enter the Black Spawn Den (Uber) at 60.0S, 57.7W.
- Complete The Gatekeeper encounter in the next room to obtain an Entrance Gate Key.
- Loot for fellowship: Black Spawn Gatekeeper's Jewel x9, Black Spawn Gatekeeper's Essence x9.
- Use the Entrance Gate Key to open the Entrance Gate.
- Proceed through the next area, hugging the right wall until you go down a ramp.
- Complete The Quartermaster encounter in the next room to obtain a Laboratory Gate Key.
- Loot for fellowship: Black Spawn Quartermaster's Jewel x9, Black Spawn Quartermaster's Essence x9, Quartermaster Cache Key x9.
- Proceed south to the next room. Use the Quartermaster Cache Key to open the weapon cache of your choice.
- Backtrack to the Tusker Slave area. Hug the right wall until you reach the Laboratory Gate. Use the Laboratory Gate Key to open the door.
- Complete The Alchemist encounter in the next room to obtain a Dungeon Gate Key.
- Loot for fellowship: Black Spawn Alchemist's Jewel x9, Black Spawn Alchemist's Essence x9.
- Proceed either east or west until you reach the next room. Kill the Cache Guard enemy.
- Loot for fellowship: West Wing Cache Key x9 or East Wing Cache Key x9, depending on which direction you chose in the previous step.
- Continue south into the next room and use the cache guard key to loot a glowing shard (Glowing Red Shard in the West Wing, Glowing Blue Shard in the East Wing).
- Continue south, down a ramp, to the next room.
- Complete the Black Spawn Obliterator encounter.
- Loot for fellowship: Black Spawn Obliterator's Heart x9.
- Proceed north and use the Dungeon Gate Key to open the Dungeon Gate.
- Continue, clearing four groups of enemies until you reach a large room.
- Use your Field Theodolite on the Hearthseeker's Mana Siphon in the center of the room to obtain Theodolite Mana Reading.
- Pick up Arbrim's Note, on the ground next to the mana siphon.
- Complete the lever puzzle to gain access to the upper floor.
- Complete The Overseer encounter.
- Loot for fellowship: Black Spawn Overseer's Jewel x9, Black Spawn Overseer's Essence x9, Glowing Pyreal Shard x1.
- Complete The Gatekeeper encounter in the next room to obtain an Entrance Gate Key.
- Turn in quest items:
- Give Arbrim's Note to Akamine Jiro to receive Arbrim's Cloak.
- Give the Theodolite Mana Reading to Ulewinna to receive a Durable Legendary Key.
- Give the Jewels and Essences to Ulewinna to receive Volatile Pyreals, luminance, and xp.
- Refer to the table below to upgrade your Virindi weapon.
Rewards
20 hour items
| Give | |
|---|---|
| Items: | |
| Give | |
|---|---|
| Items: | |
| Give | |
|---|---|
| Experience: | 50,000,000 (Fixed) |
| Luminance: | 5,000 |
| Items: | |
| Give | |
|---|---|
| Experience: | 100,000,000 (Fixed) |
| Luminance: | 10,000 |
| Items: | |
| |
| Give | |
|---|---|
| Experience: | 150,000,000 (Fixed) |
| Luminance: | 15,000 |
| Items: | |
| |
| Give | |
|---|---|
| Experience: | 200,000,000 (Fixed) |
| Luminance: | 20,000 |
| Items: | |
| |
6 day items
| Give | |
|---|---|
| Items: | |
| |
| Give | |
|---|---|
| Items: | |
| |
| Give | |
|---|---|
| Items: | |
| |
| Give | |
|---|---|
| Items: | |
| |
Rewards for unwanted items
| Give | |
|---|---|
| Items: | |
| Give a Virindi Weapon to Abra bint-Abid | |
|---|---|
| Items: | |
| Give | |
|---|---|
| Items: | |
| Give | |
|---|---|
| Items: | |
| Give | |
|---|---|
| Items: | |
| Give | |
|---|---|
| Items: | |
Black Spawn Weapons
Upgrade Line
| Skill | Base Weapon | Step 1 | Step 2 | Step 3 | |
|---|---|---|---|---|---|
| Magic | |||||
| Missile Weapons | |||||
| Two Handed Combat | |||||
| Heavy Weapons | |||||
| Light Weapons | |||||
| Finesse Weapons | |||||
Images
Click image for full size version.

The Mana Siphon

The Quartermaster

Ancient Abomination

The Dungeon

The Dungeon

The Overseer
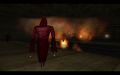
The Overseer


Dialog
- Opening Dialog
- ??
- The Gatekeeper
- ??
- The Quartermaster
- ??
- The Alchemist
- ??
- The Overseer
- You hear The Overseer's voice in the back of your mind, "Do you understand that we have led you to this moment, like an animal to the slaughterhouse?"
- The voice continues, "The way you move your face is quite fascinating, fleshling."
- The voice continues, " Perhaps we should wear your face as you have worn ours."
- A flash of blue light escapes as The Overseer’s mask is broken in two. Softly spoken words tug at the edges of your mind, “The only constant is existence. Our paths are endlessly bound to one another.”
- Handing Arbrim's Note to Akamine Jiro
- ??
- Handing Mana Readings to Ulewinna
- ??
- Handing Black Spawn Virindi Essences to Ulewinna
- ??
- Handing Black Spawn Virindi Jewels to Ulewinna
- ??
- Black Spawn Weapon Upgrades
- ??
Update History
|