The Temple of Kivik Lir
|
Temple of Ixir Zi - Temple of Liazk Itzi - Temple of Hizk Ri - Temple of Kivik Lir - Temple of Izji Qo |
| Warning: Unverified Content This page may not match in game information. Please correct any errors that exist and remove {{Needs Verification}} from the top of this page! For more information see Help:End of Retail Content. |
| Walkthrough & Notes Dungeons & Maps Rewards Images Dialog Update History |
| The Temple of Kivik Lir | |
|---|---|
| Required Level: | 60-79, 80-99, 100 |
| Type: | Fellowship |
| Starts At: | 38.1S, 47.3W |
| Route: | Mansion to Portal to Kivik Lir's Temple |
| Repeat: | 20 Hours |
Overview
This quest has three level ranges: 60-80, 80-100, and 100+.
Walkthrough & Notes
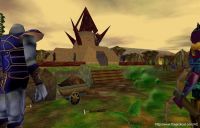
Part 1: Temple of Kivik Lir Entrance
- Take Kivik Lir mansion portal device and run to 38.1S, 47.3W.
- Go into temple and jump down into pit. Use Odd Looking Vine to enter dungeon.
- Warning: Do not talk to the Watcher of the Dead!
- Take the West hall, go WEST at the fork. When you get to a deadend room, look for a Fragment of Charred Wood on the ground.
- Go back the way you came, and this time continue straight (EAST) where you originally went west.
- When you come to another dead end room, look for a Fragment of Solidified Blood on the floor.
- Combine Wood and Blood to make Emblem of Blackened Blood.
- Go back the way you came, to the statue where you first portaled in.
- Hand the the Emblem of Blackened Blood to the statue one at a time (go slow to avoid bugs).
Part 2: Haven of Kivik Lir
- Take the SOUTH hall, and take a RIGHT at the fork. Continue to hug the wall to the LEFT all the way until you find a ramp up to a big room.
- Use the lever on the NORTH wall, which opens a door on the SE side of the room (You can also take the door on the west side if you prefer).
- Continue up the ramp until you get to a portal device (Watch out for flying daggers).
- Use all 4 eyes (one in each direction) ONE TIME. Then use Strange Device on North wall. Do all this quickly, or the device won't accept you.
- DO NOT TALK TO STATUE or do anything once inside the next part.
Part 3: Trials of Kivik Lir
- At this point in the quest, the leader must split from the group in order to complete another section of the quest (the Trials) and rejoin with the fellow in a few moments.
- There are 3 Trials, which are on a 15 minute timer. If you don't complete it in time you have to disband your fellow, and recreate it in order to start over.
- The person doing the trials (and only them) should talk to the statue at the drop ONE time.
Trial #1: The Jumps
- You should be a decent Jumper to do this part. Its the hardest trial. Its best to do this one first because the timer starts after you complete your first trial.
If the platforms are fading in and out, they are safe. If they are solid, you can fall through them.
- If you fall during the jumps, head to the back of the room and complete the last 3 steps of the trial to get back to the start.
- Head to the North. Jump up on the platform to your right side and then up again twice more to the top platform.
- You'll need to make several jumps to the little room ahead of you.
- Now jump out the back door to the platform in the far back of the room where you'll see an Eye. Use the eye to start the timer and complete the first trial.
- Jump down onto the level below you. You'll see a lever on the wall, which will open a nearby door.
- Run through the door and hang all lefts until you see another lever, which opens a nearby door. This door opens just above where you started the trial.
- Jump down to the starting platform and head south back into the waiting room.
Trial #2: Bag of Bones
- Head into the East hallway and take a left at the split. Talk to the eye on the wall and you will receive a sachel.
- Run back the way you came and go straight at the split. Use the Offering Urn to get a Brittle Bone.
- Put the bone in the Empty Satchel and return it to the eye on the wall.
Trial #3: Bloodstone Emblem
- Head into the west hallway and talk to the statue at the end of the hall twice to be portaled into a dungeon.
- You need to kill 3 creatures (1 of each species) in here, each one drops a piece of a Bloodstone Emblem: Small Bloodstone Shard, Sharp Bloodstone Fragment and Small Bloodstone Fragment.
- Once you have all 3 pieces, head back to where you portaled in and talk to the statue to be sent back to the beginning.
- Combine the small fragment and shard to create a Fused Bloodstone Chunk. Combine the fused piece with the sharp fragment to make a complete Bloodstone Emblem.
- Hand the emblem to the statue at the end of the West hallway.
- Now that you've completed all 3 tasks, talk to the statue in the middle of the waiting room to be portaled into the last part.
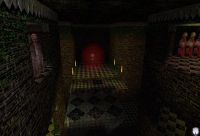
Part 4
- Use all 4 eyes ONE time, then use the portal device. Once you go in: DO NOT MOVE FORWARD.
- The person with highest creature/life magic skills will be in charge of debuffing the Boss (The Special Burun in the middle). Use Cold/Slash debuffs.
- Its also a good idea to have the lowest couple people be healers.
- If you have a mage with Tusker Fists, have them TF the wall behind the boss while everyone else kills him. Once the wall drops, the spawn dissapears.
- Once the boss and the wall are down, head through the opening, up the ramp, and use the statue at the end of the hall to be portaled into the treasure room
- Use the Sarcophagus of High Matriarch, Kivik Lir to receive your main reward and then choose 1 additional reward by using one of the daises around the room.
Notes
- When using the sarcophagus to obtain your leggings, you'll get 2 nasty debuffs cast on you that cannot be dispelled. They last an hour, so if you have the Enduring Enchantment augmentation, you'll have to sit it out. Otherwise you can suicide to get rid of them.
Dungeons & Maps
| Dungeon | Coordinates | Wiki Map | ACmaps |
|---|---|---|---|
| Temple of Kivik Lir Entrance | 38.1S, 47.3W | -- | 0272 |
| Lyceum of Kivik Lir | N/A | -- | 0272 |
| Haven of Kivik Lir | N/A | -- | 0275 |
| Trials of Kivik Lir | N/A | -- | 0276 |
| Arena of Kivik Lir | N/A | -- | 0276 |
| Triumph Against the Trials | N/A | -- | 0276 |
| Gallery of Kivik Lir | N/A | -- | 0277 |
| Crypt of Kivik Lir | N/A | -- | 0272 |
Rewards
Items
Main Reward
(1) Additional Reward
![]() Manacle of Biting Pain
Manacle of Biting Pain![]() Tears of Jvikti Kheval
Tears of Jvikti Kheval![]() Scroll of Lesser Conjurant Chant
Scroll of Lesser Conjurant Chant![]() Scroll of Conjurant Chant
Scroll of Conjurant Chant![]() Scroll of Greater Conjurant Chant
Scroll of Greater Conjurant Chant![]() Scroll of Superior Conjurant Chant
Scroll of Superior Conjurant Chant![]() Scroll of Lesser Artificant Chant
Scroll of Lesser Artificant Chant![]() Scroll of Artificant Chant
Scroll of Artificant Chant![]() Scroll of Greater Artificant Chant
Scroll of Greater Artificant Chant![]() Scroll of Superior Artificant Chant
Scroll of Superior Artificant Chant![]() Scroll of Lesser Vitaeic Chant
Scroll of Lesser Vitaeic Chant![]() Scroll of Vitaeic Chant
Scroll of Vitaeic Chant![]() Scroll of Greater Vitaeic Chant
Scroll of Greater Vitaeic Chant![]() Scroll of Superior Vitaeic Chant
Scroll of Superior Vitaeic Chant![]() Scroll of Lesser Hieromantic Chant
Scroll of Lesser Hieromantic Chant![]() Scroll of Hieromantic Chant
Scroll of Hieromantic Chant![]() Scroll of Greater Hieromantic Chant
Scroll of Greater Hieromantic Chant![]() Scroll of Superior Hieromantic Chant
Scroll of Superior Hieromantic Chant![]() Scroll of Lesser Conveyic Chant
Scroll of Lesser Conveyic Chant![]() Scroll of Conveyic Chant
Scroll of Conveyic Chant![]() Scroll of Greater Conveyic Chant
Scroll of Greater Conveyic Chant![]() Scroll of Superior Conveyic Chant
Scroll of Superior Conveyic Chant
- Conjurant Chant = Creature Enchantment
- Artificant Chant = Item Enchantment
- Vitaeic Chant = Life Magic
- Hieromantic Chant = War Magic
- Conveyic Chant = Mana Conversion
Images
Click image for full size version.
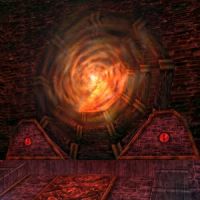
Strange Device


_Live.jpg)
Dialog
- Guardian (Temple Entrance)
- Guardian tells you, "The Lady of this temple, Kivik Lir, has deemed it closed to visitors. Only her students may pass through the gates beyond. Should the student present a glyph bearing the union of blood and shadow, the doors of knowledge shall open. Those without the glyph of the Lady Kivik Lir shall be turned away from this temple, for her knowledge is not for you."
- Guardian tells you, "Heed my warnings. I shall sup upon your blood and send you from this place should you speak with me again, or should you fail to present the correct glyph."
- Handing in Emblem of Blackened Blood
- Guardian tells you, "Welcome to the halls of Kivik Lir's temple, child. I will now transport you to the staging area. You will be able to prepare yourself there before continuing further in your training."
- Guardian of the Trials
- The Guardian of the Trials speaks into your minds.
- Welcome, young initiates. You have found your way beyond the guardians of the Tomb of Kivik Lir. You have done well to reach this point. By the Watcher, you shall awaken the High Matron. But there are still spirits to defeat and still challenges that you must complete to prove your worthiness."
- Within this very hall lie several such challenges. Each must be completed by you within a set period of time. When you have completed all of the tests, and only then, return to me. If you have succeeded, you shall be granted passage deeper into the halls of Kivik Lir's temple."
- Should you fail... then I shall be forced to rid these halls of your presence. Pray to the Iakvi Liviliakti that you do not fail."
- Eye of the Watcher
- The Eye of the Watcher shudders for a moment and settles. Without warning, a voice with the sound of metal scraping on metal chimes into your mind.
- The Lady Kivik Lir has a fondness for Sacrificial Urns. In her time, she collected quite a few of them. In the Antechamber, she keeps six stacks of Sacrificial Urns. Within her personal chambers, she keeps three stacks of Sacrificial Urn. And here, in these halls, she keeps five stacks of Sacrificial Urns. If the Lady Kivik Lir were to put them all together, how many stacks would she command?"
- Eye of the Watcher gives you Empty Satchel.
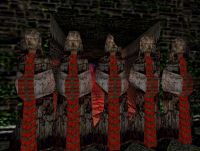
- Guardian of the Arena
- The Guardian of the Arena speaks into your minds.
- Beyond these walls lie the arenas of Kivik Lir. Within these blood spattered walls, the students of Kivik Lir tested their will against others. Those who were deemed champions were presented a Bloodstone Emblem, symbol of might in combat."
- Those who present a Bloodstone Emblem will be judge worthy and permitted to continue further in the Lady's temple."
- A warning to those who are unworthy, presentation of anything but the Emblem will result in punishment."
- Those who wish to test their mettle against other students should now speak to me once again."
- Conveyor of the Arena
- The Conveyor of the Arena speaks into your mind.
- Prepare yourself, for I shall now ferry you back to the master of the trials."
- If you are victorious and wield the Emblem of Victory, present it to the Guardian of the Arena."
- Guardian of the Trials (On completion of all three trials)
- The Guardian of the Trials speaks into your minds.
- You have done well children. You may proceed further towards our sleeping mistress, Kivik Lir."
- Using the Sarcophagus of High Matriarch, Kivik Lir
- Despite your better judgement, you look over the sarcophagus for trinkets.
- Sarcophagus of High Matriarch, Kivik Lir tells you, "Defiler! You seek to ruin my slumber and my home? Suffer for your insolence!"
- Sarcophagus of High Matriarch, Kivik Lir cast Kivik Lir's Venom on you
- Sarcophagus of High Matriarch, Kivik Lir cast Decay on you
- Sarcophagus of High Matriarch, Kivik Lir gives you Ancient Armored Leggings.
- Tears of Jvikti Kheval gives you Tears of Jvikti Kheval.
Update History
|