Swamp Temple Quest
Jump to navigation
Jump to search
| Verified This page has been verified to match the content available on Levistras. |
| Walkthrough & Notes Dungeons & Maps Rewards Images Dialog Update History |
| Swamp Temple Quest | |
|---|---|
| Required Level: | 15 |
| Type: | Solo |
| Starts With: | Swamp Temple |
| Starts At: | Yanshi |
| Route: | Yanshi to Swamp Temple Place settlement. |
| Repeat: | 20 hours |
Overview
Explore two ancient Falatacot temples to discover their treasures.
This very early quest is an example of the dungeon treasure hunting style of quests. Although this type of quest became fairly useless early on, the Swamp Temples are still interesting dungeons to explore, especially since they have gone untouched all these years and offer a glimpse of early Dereth.
- Lockpicking is not required, but will allow you skip gathering some or all of the keys needed for this quest.
Walkthrough & Notes
Part 1: Blackmire Swamp Temple
- Optional: Head into the Swamp Temple (10+) and read the Swamp Temple Tome. This will explain that you need a key from outside to get any further than the first room.
- Head to 23.8S, 49.6E and enter the Bunker found there. Take the Carved Key found on the ground.
- Head to 23.4S, 47.9E and enter the Swamp Temple. The first few levels of this dungeon are rotationally symmetric.
- From the drop, head to one of the locked doors (resistance: 355) to the SW or NE and unlock it with the Carved Key or pick the lock. Proceed down one level (level -1).
- From level -1, take the hall on the mid-northern or mid-southern walls down one level (level -2).
- From level -2, head to the center of the level, and head either east or west. These two paths lead to a single room deeper down (in level -6) with an Empyrean Stone Head, one of the Heads of Tafelicor, against one wall.
- In the Empyrean Stone Head room, kill the special level 15 Mosswart Shaman and loot its Skull-shaped key. Return up to level -2.
- From level -2, proceed to the SW or NE cornes and take the hallways leading down one level (level -4).
- On level -4 hug the right wall until you come across a hallway leading up one level (level -3).
- On level -3 you will find a locked door (resistance: 432). Open this door with the Skull-shaped key or pick the lock. This leads to the throne room/treasure room with a Mosswart Chief, several Mosswart Shamans, and various lesser mosswarts. There are 6 chests to loot here, all unlocked. When you are done, proceed back down to level -4.
- Back on level -4, hug the left wall to reach either a door to the north or to the south with a warning sign. This is a one-way travel warning. the doors will lock from the inside once they close (resistance: 242). Enter the doors to proceed into the cave area.
- Optional: In the cave area, head east an unlock a door (resistance: 40) to find a hidden underground lifestone.
- In the cave area, head west, passing a portal to the Sho Roadside, to proceed to out of the cave area and into the final area of the temple.
- Custom: The Sho Roadside portal has been replaced with a Western Swamp Temple portal.
- Entering from the east, head north or south. You will come to a 5-way intersection. If you are on the north side, head south. If you are on the south side, head north. These two paths meet up in the center, where you will find two more hallways leading down even deeper. In this deepest area of the temple, you will find another chest to loot. Proceed back up to one of the 5-way intersections.
- From the 5-way intersection, take the opposite direction as before - if you are north head north and if you are south head south. This leads to the final room of the temple.
- In the final room, pick up the Grotesquely Carved Key from the ground and loot two more chests. Leave the temple.
- Custom: Defeat the Essa Sclavus Ritualist and loot a Sacrificial Knife from the corpse.
- Custom: Backtrack to the Western Swamp Temple Portal and hand the Sacrificial Knife to the Offering Basin. You are now flagged to enter the Western Swamp Temple portal.
- Custom: Enter the Western Swamp Temple Portal.
Part 2: Direlands Swamp Temple
- Head to the Swamp Temple (15+) located at 37.6S, 46.1W in the East Direlands Swamp.
- Route 1: Dryreach to East Direlands Swamp Portal (8.1S, 74.5E), run to temple.
- Route 2: Sawato to Mire Hill Portal (27.2S, 59.9E), Mire Hill to Incunabula Vault (23.0S, 60.0E), surface portal to 35.9S, 47.2W, run to temple.
- Route 3: Use the Portal to Kivik Lir's Temple at your mansion, run to temple.
- From the drop, head east. You will find a locked door (resistance: 500). Open it with the Grotesquely Carved Key or pick the lock.
- Head down. Passed the room with gromnies, you will come to a large room very similar to the final room of the Blackmire temple, with hallways in the NE and SE corners.
- The hallway in the NE corner leads to a chamber with Undead (zombie - revenant). In order to enter this champer you must jump down a small pit. If you choose to do so, there is a surface portal so you can re-enter the dungeon. The hallway in the SE corner leads on to the rest of the dungeon.
- Take the hallway in the SE corner. This will lead you to the area high above the large room with doorways looking down. Proceed west to advance. This leads to a large, multi-level room with numerous ledges and doorways opening into the large, main chamber.
- From the bottom of this room, head west into a hallway. Go north (right). At the next intersection go north (left). At the next intersection go east (right) to find two more treasure chests. Proceed back to the 2nd intersection, this time going south. This leads to the final room of the temple.
- In the final room, there are 5 unlocked loot chests to loot and one SIK chest. Leave the temple.
- Custom: Defeat the Anointed Sata Sclavus and loot a Crest of the Falatacot Lords.
Dungeons & Maps
| Dungeon | Coordinates | Wiki Map | ACmaps |
|---|---|---|---|
| Swamp Temple (Yanshi) | 23.4S 47.9E | -- | 01A2 |
| Swamp Temple (Wai Jhou) | 37.6S, 46.1W | -- | 019C |
Rewards
Custom:
| Defeat the Anointed Sata Sclavus | |
|---|---|
| Items: | |
Images
Click image for full size version.

Portal to the Swamp Temple near Yanshi
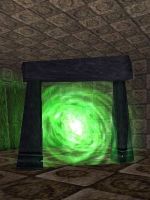
Portal to the Swamp Temple near Wai Jhou
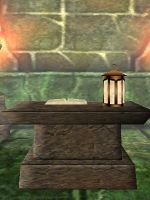
Swamp Temple Tome
_Live.jpg)
_Live.jpg)

Dialog
- Ru Shaha's Dialog
- Ru Shaha the Healer tells you, "Thank you. Say, have you heard of the Swamp Temple? I hear you need to get a key before you can go far within it, though."
- Using the Offering Basin Dialog
- As you reach out to touch the basin, your heart begins to pound and you become keenly aware of the blood coursing through your veins.
- Hand the Sacrificial Knife to the Offering Basin Dialog
- You make a small cut in your hand and release blood into the basin. The blood vanishes into unseen holes. You feel changed.
Update History
|