Four Corners of Dereth
Jump to navigation
Jump to search
| Warning: Unverified Content This page may not match in game information. Please correct any errors that exist and remove {{Needs Verification}} from the top of this page! For more information see Help:End of Retail Content. |
| Walkthrough & Notes Dungeons & Maps Rewards Images Dialog Update History |
| Four Corners of Dereth | |
|---|---|
| Required Level: | 180 |
| Type: | Fellowship |
| Starts With: | El'Yst Maggann (optional) |
| Starts At: | Yanshi at 12.0S, 42.5E |
| Repeat: | 20 Hours |
Overview
Travel to dungeons located at the four corners of Dereth to acquire four signet fragments.
Walkthrough & Notes
Part 1: The Charged Niche
- This one involves a lever puzzle, unknown if it can be done solo.
- The Charged Niche is located at 91.6N, 46.8E, on Aerlinthe island.
- Route: Aerlinthe Recall or giving a D Note to Garaena the Emissary outside Candeth Keep. Run north and along the inner bay shore on Aerlinthe until you reach the crater to the north in the middle of the island. Take the path upward on the right side of the crater and follow it around to the back of the crater rim.
- The drop has one enemy there, but is otherwise safe. The dungeon itself contains Mu-miyah Lords, Dust Golems, along with a few Infectious Rats.
- In this dungeon you will need to hit a series of levers in order to progress through the dungeon.
- From the drop go until you come to a 4 way split with 3 wooden doors. The first lever you will need to hit, will open the door to the west.
- To get to the lever, take the east door, then turn south, then east and follow the hall to the lever at the end. Pull it, then retrace your steps to the 4 way intersection. The west door will now be open.
- Jump across from the west door. When you land there will be 3 paths. To find the lever in this section, begin by heading south.
- Ignore the 1st turn on the left, and continue west and take the SECOND left (south). The lever will be at the end of the hall.
- After pulling the lever backtrack and take the 1st turn (now on the right) heading south that you passed moments ago.
- At the top of the ramp will be a jump. Take it. This will put you back at the start of the dungeon. The north door will now be open. Jump across.
- To get to the next lever take the north path, followed by a left (west). The lever will be at the end of the hall.
- Note: After pulling this lever the final door will open. You will need to move fast to get back to it before it closes however (if by yourself). It seems to have a 3 minute timer so killing on your way back to it is not advised.
- Pull it then backtrack to pit you jumped across. You will now need to take an alternate path to get back to the start of the dungeon.
- The path back is littered with a series of short dead ends. Begin by going west and continue up a ramp.
- At the top of the ramp head as far south as you can, then bear right (west).
- Up another ramp then follow the hall south. In the small room head left (north) and then exit south from the next small room.
- Continue to follow the hall east and you will head up another ramp. On the left will be the same jump you took earlier. Take it again now.
- From the entrance head back to the intersection with the 3 doors, and take the east door and continue east at the split. The door will be open and you can now jump across.
- Talk to the Bak'tshay Keeper and a he becomes attackable, the door into the room will lock behind you and 3 Infectious Rats will also spawn.
- Tip - Kill the Infectious Rats 1st as they chain cast Incantation of Fester Other.
- Defeat the Bak'tshay Keeper.
- Loot a Signet Fragment (drops 9) and head to the next dungeon.
Part 2: The Fiery Alcove
- This dungeon involves a jumping puzzle.
- The Fiery Alcove is located at 79.1s, 90.1e, a short run from Kryst.
- Route: Take the portal to Kryst in the Sho (east) wing of the Town Network. Then follow the island chain around to the dungeon.
- The drop inside the dungeon is safe. Go straight, ahead is a room with Mumiyah Lords, kill them.
- The dungeon is not long but has a floating platform room that requires you to navigate from one side all the way around to an elevated doorway the other side by jumping from platform to platform.
- If you happen to fall into the room that holds Infectious Rats, use either of the exit halls to run back up to the top, all paths leads directly back to same area at the top.
- Video of the solution to Jumping Puzzle
- Once you have successfully jumped across the room and landed inside the doorway on the other side you will see the Bak'tshay Keeper in the nest room.
- Talk to the Bak'tshay Keeper and as he becomes attackable, the door into the room will lock behind you and 3 Infectious Rats will also spawn.
- Tip - Kill the Infectious Rats 1st as they chain cast Incantation of Fester Other.
- Defeat the Bak'tshay Keeper.
- Loot a Signet Fragment (drops 9) and head to the next dungeon.
Non-Jumping Strategy
- It is possible to complete this part of the quest for a group without having everyone complete the jumps.
- Have 2 people complete the jumping portion to the far doorway. Have everyone else in your group clear the floor of the large room and wait underneath the far doorway above.
- Have one of the two jumpers stand in the doorway to bug the door when the keeper is attacked. This person must not move.
- When everyone is in position, have the second jumper talk to the keeper to begin the boss fight. Kill the rats first, then bait the keeper into attacking and drag him from the room.
- Have the second jumper jump to the platform just outside the doorway, the keeper will follow and plummet to the floor below.
- The rest of the group should now kill the keeper and loot the fragments.
- If more fragments are needed, have the 2 jumpers stay in place until the keeper respawns. Then repeat the process.
Part 3: The Frozen Recess
- The Frozen Recess is located at 95.0n, 39.1w, a short run from Eastwatch.
- Route: Take the Eastwatch portal in the Annex wing of the Town Network. Then jump off the cliff and run.
- The drop inside the dungeon is safe. In the entrance is a Burning Sands Guardian accompanied by two Mu-miyah Lords, guarding three locked doors (left and right Resistance 850, straight ahead Resistance 999). Kill the golem and loot a Chilled Key. Use the key to open the south door.
- Follow the halls South until you head down a ramp. In the next room, take the exit heading west. Follow the hall until you come to another room with multiple exits. Take the North exit and you will come to a series of jumps.
- Make two jumps across and there will be an open door into a room to the south. The danger here is in overshooting the jumps and falling into one of the pits. If this happens you must portal recall and run back.
- For a character with 500 buffed jump skill, the first jump is a 50% regular jump. For different jump skill levels, adjust accordingly.
- For a character with 500 buffed jump skill, the second jump is a 25% regular jump. For different jump skill levels, adjust accordingly.
- If anyone falls, others can run back to the start of the dungeon to open the locked door from the inside, if desired.
- Talk to the Bak'tshay Keeper and as he becomes attackable, the door into the room will lock behind you and 3 Infectious Rats will also spawn.
- Tip - Kill the Infectious Rats 1st as they chain cast Incantation of Fester Other.
- Defeat the Bak'tshay Keeper.
- Loot a Signet Fragment (drops 9) and head to the next dungeon.
Part 4: The Stinging Corner
- The Stinging Corner is located at 95.3s, 89.7w, on Singularity Caul island.
- Route: Use Singularity Recall and then run.
- This dungeon is a true maze. From the start, head right (east). Ignore the little loop in the hall on your left, and take the next left bearing north until you arrive at a T intersection.
- Take the left heading West to the corner of the hall, then follow the hall north to another T intersection.
- Head left (west) followed by another immediate left heading south.
- Ignore the left turn and proceed west down the hall and down the ramp. At the bottom of the ramp take the right turn heading east.
- Ignore the little loop on your right and take the first actual hall on your right bearing east.
- Take the first hallway on your right and head as far south as you can until the hallway turns. Follow it west and take the first hallway you come to on your left (heading south).
- At the next T intersection head left (east). Ignore the halls on your left and right, and simply follow the hall as far west as you can until it turns north and takes you up a ramp.
- At the top of the ramp take a right (heading east) followed by a left at the T intersection (heading west).
- Ignore the turn on your left and instead proceed down the hall as it heads east and then turns south.
- Take the next hallway on your right (heading east) and follow the hallway south until it takes you down a ramp.
- Talk to the Bak'tshay Keeper and as he becomes attackable, the door into the room will lock behind you and 3 Infectious Rats will also spawn.
- Tip: Kill the Infectious Rats 1st as they chain cast Incantation of Fester Other.
- Defeat the Bak'tshay Keeper.
- Loot a Signet Fragment (drops 9) and head to the next dungeon (if you have not completed them all yet).
- Combine the the Signet Fragment (Frozen Recess) and Signet Fragment (Fiery Alcove) to create a Combined Signet Fragment (1st half)
- Combine the Signet Fragment (Stinging Corner) and Signet Fragment (Charged Niche) to create a Combined Signet Fragment (2nd half)
- Combine the two resulting halves to create the Complete Signet
- Return the completed signet to El'Yst Maggann in Yanshi at 12.0S, 42.6E. This will flag you to enter the Sanctuary of the Recluse within the Lost City of Neftet.
- Warning: The flagging is permanent. There is no need to repeat the 4 corners dungeons.
Part 6: The Sanctuary of the Recluse
- Head to the Sanctuary of the Recluse at 20.8S, 7.5E within the Lost City of Neftet. It is located on top of one of the taller buildings.
- Route: Use Neftet Recall or run east from Yaraq.
- From the drop follow the hallway heading north.
- Note: Should you wish to loot the Chorizite Chest within the dungeon, take the path to the west. It is a series of rooms and T paths with dead ends one way, and the hall continuing the other. At the end is a room with four Dust Golems and the chest.
- As you head north you will reach a room with four Mu-miyah Lords and killable door. Take down the door and continue down the hall.
- In the following section the dungeon you have the option of using lockpick to continue on (door has 850 resistance) or killing a Dust Guardian for an Ancient Dusty Key to open a second door
- If you wish to use the lockpick option simply go North west and pick the first wooden door you come to, then jump across the gap. If you plan on killing the guardian, head north east to the room he is in and kill him, then head back to the North west bypassing the first wooden door and instead using the key to open the second wooden door (999 resistance).
- Regardless of which method you picked, open the door, jump across the gap, and take the first turn you can heading south (the 2 paths meet back up at this intersection) until you come to a room with an altar in the middle of it.
- Using the altar will spawn two Bak'tshay Lackeys and four Dust Golems. As each Baktshay dies, it will spawn two Pillars in the corners of the room. Archers and Mages should quickly kill the Pillars as they are very dangerous!
- As each set of Pillars is destroyed, one of the two doors leading to the next room will open. The two doors are on separate timers, so the Baktshay Lackeys need to both die within a short amount of time of each other.
- Note: If alone or with a small group, after the first Baktshay dies you can draw the second into the now open hallway and kill it there. Then if the first door closes, you are already inside and past it.
- Once both are dead and the second door opens head into the small room beyond which contains an altar. Now is the last time to rebuff or prepare for the final fight ahead. When your group is ready use the altar.
Part 7: Lair of the Magus
- The drop into the Lair of the Magus is a very hot drop. When you come out of portal space you will be in a room with numerous Mu-miyah Lords, a Mu-miyah Magus, and a Mu-miyah Recluse. All of these creatures can cast various forms of magical walls, waves, and rings (both War and Void). Be careful of getting multi-shot by bomb and ring spells.
- A good strategy tends to be attacking the Dust Golems first, then the Lords, then the Magus and Recluse. This way you can minimize the number of spells flying around the room as quickly as possible. The Mu-miyah Magus uses Void Magic. Beware of getting hit by a void drain spell in the chaos of the battle.
- When the Recluse dies, a sarcophagus will spawn in the center of the room. Use it to get to the rewards room. There is a 3 minute timer on the sarcophogus so do not delay.
- Note: Because of the obstacles in the dungeon (destroyable door, locked door, mini boss room) and the timer on the sarcophogus, it is unlikely that anyone who dies will be able to get back.
- Speak to the Lingering Spirit of the Recluse NPC for your Legendary Key and a non-useable Idol of the Recluse. Use the key on the chests nearby.
- Return to El'Yst Maggann and give her the idol for your rewards.
Dungeons & Maps
| Dungeon | Coordinates | Wiki Map | ACmaps |
|---|---|---|---|
| Charged Niche | 91.6N, 46.8E | -- | -- |
| Stinging Corner | 95.3S, 89.7W | -- | -- |
| Fiery Alcove | 79.1S, 90.1E | -- | -- |
| Frozen Recess | 95.0N, 39.1W | -- | -- |
| Sanctuary of the Recluse | 20.8S, 7.5E | -- | -- |
| Lair of the Magus | ?? | -- | -- |
Rewards
| Experience: | 400,000,000 (??% up to level ??) |
| Luminance: | 20,000 |
| Items: | |
Images
Click image for full size version.
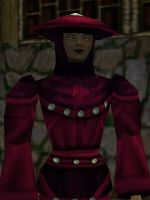
El'Yst Maggann
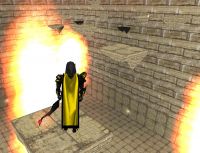
Fiery Alcove jumping room
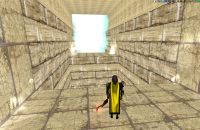
Frozen Recess jumping room
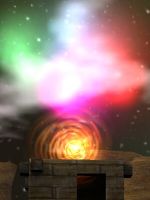
Portal to the Sanctuary of the Recluse


Dialog
- Opening Dialog
- El'Yst Maggann tells you, "Good day, friend. If you have a moment, I have a task I need assistance with."
- El'Yst Maggann tells you, "Many moons ago a powerful mage "removed" himself from society so he could focus solely on mastering the magical arts."
- El'Yst Maggann tells you, "Using his knowledge of ancient powers, he succeeded in locking himself away from the rest of the world, along with a certain artifact I very much desire."
- El'Yst Maggann tells you, "To enter his sanctuary, you will need to find 4 pieces of a sigil that were hidden from the prying eyes of Dereth. All four pieces are needed for his protections to be bypassed."
- El'Yst Maggann tells you, "They have been sent to the 4 corners of Dereth, hidden far from the citizens of the mainland."
- El'Yst Maggann tells you, "Return with these items and I will be able to grant you access to Recluse's lair."
- El'Yst Maggann tells you, "You must find the 4 hidden pieces in order for me to allow you to bypass the Recluse's Wards on his lair."
- El'Yst Maggann tells you, "Find the 4 pieces, combine them, and return to me."
- Bak'tshay Keeper tells you, "Another brave adventurer. Take my advice and scurry back to where you came from."
- Bak'tshay Keeper tells you, "If you force my hand, no mercy will be given."
- Rewards Dialog
- Lingering Spirit of the Recluse tells you, "I hope your thirst for blood and treasures have been sated and you will leave this place."
- Lingering Spirit of the Recluse tells you, "Please leave my sanctuary and do not return. I only desire solitude and wish harm to none."
- Lingering Spirit of the Recluse tells you, "The idol is surely what you seek. I give this to you and ask only to be left undisturbed."
- Lingering Spirit of the Recluse gives you Legendary Key.
- Lingering Spirit of the Recluse gives you Idol of the Recluse.
- You've earned 400,000,000 experience.
- You've earned 20,000 Luminance.
- El'Yst Maggann gives you 20 Trade Notes (250,000).
- El'Yst Maggann gives you Idol of the Recluse.
Update History
|