Forgotten Tunnels of Nyr'leha
Jump to navigation
Jump to search
| Warning: Unverified Content This page may not match in game information. Please correct any errors that exist and remove {{Needs Verification}} from the top of this page! For more information see Help:End of Retail Content. |
| Notice: Unavailable Content This page has been imported from the Asheron's Call Community wiki, and reflects the content at the end of retail. This content is not yet available on Levistras. For more information see Help:End of Retail Content. |
| Walkthrough & Notes Dungeons & Maps Rewards Images Dialog Update History |
| Forgotten Tunnels of Nyr'leha | |
|---|---|
| Required Level: | 180 |
| Society Rank: | Lord |
| Type: | Fellowship |
| Starts With: | Jin Kyong (CH) Chun Hei (EW) Myung Hee (RB) |
| Starts At: | Celestial Hand Nyr'leha Beach Fort at 92.1S, 50.3W Eldrytch Web Nyr'leha Beach Fort at 91.4S 53.8W Radiant Blood Nyr'leha Beach Fort at 93.6S 51.8W |
| Repeat: | 20 Hours |
| Contracts: | Contract for Forgotten Tunnels of Nyr'leha |
Overview
Explore a buried temple on west Moarsman City island to find four crystals that disrupt energy field generators long enough for you to retrieve two artifacts. Your society rewards you with a society shield.
- You must be at least a Lord in one of the three Societies of Dereth to do this quest (and a Master to wield the shield).
Walkthrough & Notes
- Head to your society's beach fort on Moarsman City and speak to the appropriate listed NPC.
- Head to the Forgotten Tunnels. There are three different locations, they all go to the same dungeon, just drop you in a different corner of a triangular layout. It makes no difference which portal you use (see below for more details):
- 92.9S, 56.4W
- 93.1S, 56.9W
- 93.6S, 56.6W
- You will need four gems for your group (2 purple and 2 orange), designate one person to pick up gems and have only that person pick them up (all gems need to be on the same person).
- From the drop either stick left or stick right (you follow a circular path around the triangular shaped dungeon). You will pass 4 rooms with a spawn of sclavus or moarsman. In each room a guardian drops a key (Key (Guardian Moarsman) and Key (Guardian Sclavus)) that opens a small side room with one of the four crystals. You will also pass two rooms with golems, for the moment just save the two keys that drop on the golem guardians.
- NOTE: While all the keys are named "Key" and have 2 uses, each room's key is unique and will only open that room's door, so you will need to kill all six Guardians.
- Once you have all four gems (2 Orange Energy Crystals and 2 Purple Energy Crystals) and the two Keys from the golem rooms, head back a golem room (one is on the east side of dungeon and one is on the west side).
- Use the key to open the door and use the lever, have the person that picked up all the gems go up the ramp and jump (normal jump straight across the room). The rest of the group should continue circling until they come back to the other golem room, use that room's key to get to lever, now everyone go up ramp and and jump across to join the gems holder.
- Directions for person holding all 4 gems: The jump leads into a large room with walkways above a pit full of Slithis. The east and west walkways lead to the two guardian golem rooms. The north and south walkways lead to rooms with the Energy Field Generators. The two levers (one in each golem room) open the north and south doors respectively). Check which one opened first and jump across to the field generator. Each side takes 2 of the gems (North two orange and South two purple). Hand one gem and it will take both of that color). Then use a low power tap jump to return to the slithis area (if you use too much power you will hit your head and fall into the pit with no way back up).
- Once the main group has used the other golem lever, the last door will be open (north or south). The gem holder jumps across and hands the remaining two gems then tap jumps back to the slithis area. Everyone should now jump down and use the Energy Ring in the middle of the slithis. This will give everyone an Energy Ring (handing in the four gems drops the fields and makes the ring usable, if the fields are still up you won't get a ring in your pack).
- You now need to return to the drop area (each drop from each of the three portals has two lever doors by the drop). All three drops (all six doors) lead up to the same location. Handing in the four gems and using the energy ring starts a 5 minute timer. When this timer is up all the lever doors at the bottom of the three dungeon portal drops will open and stay open for 3–5 minutes. If you use a faction statue/portal you have enough time to run back to the dungeon and still make the door. If you jumped back across the pits, just wait at one of the six doors for it to open.
- Go up (using a gem style lever to open a door midway) until you come to a large room with a ramp, go up the ramp and jump down (an invisible floor keeps you from falling onto the spikes).
- Continue and kill the Guardian of The Secret Keeper who opens the two doors by him, they both go to the same place.
- Kill The Secret Keeper. Loot a Glimmering Shard (he drops 9).
- Return to your faction's fort on Moarsman City island outside (there are no surface portals, you will need to return normally) and give the ring or shard to the NPC (he takes both and gives you xp and the shield for your faction).
- The shields are givable, but if you don't want it at all, you can turn it in to the fort NPC for a small amount of xp (3.5 mill).
Notes
- It is unclear why there are two field generators on the south side, perhaps it is an erroneous duplicate.
Dungeons & Maps
| Dungeon | Coordinates | Wiki Map | ACmaps |
|---|---|---|---|
| Forgotten Tunnels | 92.9S, 56.4W 93.1S, 56.9W 93.6S, 56.6W |
-- |
Rewards
| Experience: | 300,000,000 (30% up to level 200) |
| Luminance: | 15,000 |
| Items: | |
| |
| Give unwanted shield to society NPC | |
|---|---|
| Experience: | 3,500,000 (Fixed) |
Images
Click image for full size version.

The three burrow entrances to the dungeon.

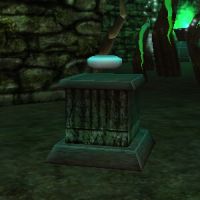
Energy Field Generator
Energy Ring

Mysterious White Mist


Dialog
Opening Dialog
- Jin Kyong tells you, "Over on the west side of the island we have discovered a long forgotten system of tunnels under the island. At first look it appears these may be part of an ancient temple. We ask you to investigate this place and bring back to me any items of interest you may find there. But be warned, it is a dangerous place."
Rewards Dialog
- You allow Jin Kyong to examine your Energy Ring.
- You hand over 1 of your Glimmering Shards.
- You hand over 1 of your Energy Rings.
- Jin Kyong gives you Shield of the Celestial Hand.
- Jin Kyong gives you Braced Mana Forge Key.
- You've earned 300,000,000 experience.
- You've earned 15,000 Luminance.
- Jin Kyong tells you, "I will send these items to our researchers immediately. You say he also mentioned something about the mist and finding white mist in the final room? This is a mystery indeed. Thank you for your efforts soldier, hopefully this all leads to a great discovery."
- You give Jin Kyong Shield of the Celestial Hand.
- Jin Kyong tells you, "You don't want this finely crafted shield? Well I shall compensate you for it instead."
- You've earned 3,500,00 experience.
Other Interactions
Showing Crystals
- You allow Jin Kyong to examine your Purple Energy Crystal.
- Jin Kyong tells you, "This is an interesting item indeed but I suspect it will lead you to even greater finds."
- You allow Jin Kyong to examine your Orange Energy Crystal.
- Jin Kyong tells you, "This is an interesting item indeed but I suspect it will lead you to even greater finds."
Using Field Generator Without Both Crystals
- You feel the energy flowing from this device as your hand nears it. You decide it is best not to touch it.
- You allow Energy Field Generator to examine your Orange Energy Crystal.
- You think it would be wise to insert both crystals at the same time.
Using North Field Generator With Both Orange Crystals
- You allow Energy Field Generator to examine your Orange Energy Crystal.
- You hand over all of your Orange Energy Crystals.
- You hand over all of your Orange Energy Crystals.
- You drop all of the orange crystals you have into the device.
Using South Field Generator With Both Purple Crystals
- You allow Energy Field Generator to examine your Purple Energy Crystal.
- You hand over all of your Purple Energy Crystals.
- You hand over all of your Purple Energy Crystals.
- You drop all of the orange crystals you have into the device.
Using the Energy Ring Without Dropping the Energy Field
- As you reach for the ring your hand burns from the fields surrounding it.
Using the Energy Ring After Dropping the Energy Field
- As you try to grab the ring a new one appears in your hand.
- Energy Ring gives you Energy Ring.
Update History
|