Lord Test
Jump to navigation
Jump to search
| Verified This page has been verified to match the content available on Levistras. |
| Walkthrough & Notes Dungeons & Maps Rewards Images Dialog Update History |
| Lord Test | |
|---|---|
| Required Level: | 180 |
| Society Rank: | Knight |
| Type: | Solo |
| Starts With: | Philonius Porbandar (CH) Istonia Charson (EW) Gamri Nightshade (RB) |
| Starts At: | Faction Stronghold (east wing) |
| Repeat: | Non Repeatable |
Overview
- Prerequisites
- You must first hand in a total of 595 Commendation Ribbons to the Commendations Officer in your society stronghold, before you can start the quest.
- It is possible to make mistakes on this quest. You will have to start the quest over, especially if you hand in the wrong item to your Clan member.
Walkthrough & Notes
Part 1: Flagging
- From Eastwatch head north to the Blighted Verdant Moarsman Tunnels at 92.7N 42.3W.
- From the portal drop, take all lefts until you reach the Moarsmen Priory (180+) portal (its not far).
- Once inside the Priory you'll first come to an octagon shaped bridge, go east (north and south loop around to the pit below the bridges). Continue until you come to a large room with ramps dropping down to a basin with an altar in the middle. A floor plate directly in front of the north door opens it. (The two locked doors on the east wall and south wall also lead to the final room but don't save any time, see map.)
- Once you've opened the door go north you'll soon come to another large room with two Surface portals, do not go in any of them, go to the southeast corner of the room and a tunnel leads out of the room, stick left until you come to a very large room, back up and stay in the hallway, killing Moarsmen until Prior Kothmox appears. He drops Kothmox's Staff.
- Note: Prior Kothmox is surrounded by a large number of moarsman, and there is only one way in and out. The spawn is relatively slow, so it's best to clear the room before fighting Prior Kothmox. Proceed with caution.
- Alternate Note: The Prior can be very tricky and long to kill especially if the spawn keeps attacking. Attack and kill the Moarsman right before the down ramp without bringing out any other moarsman. Once they are dispatched inch your way down the ramp. You will probably set off the spawn but only a few will make it up to you on the ramp. Kill them. If the Prior comes also ensure you keep his attention. If he does show up, clear the spawn and inch down the ramp a little more without setting off the moarsmen in the room and ensuring the respawn behind will not get involved. At that time you can kill the Prior. If he does not show up after you have dispatch a few of the first spawn, let them reset. Inch down until you can see the feet of the Prior in front of you. You cannot see him on radar at this time. Do not go too far or you will alert the spawn. Once you have his feet hit him with some spells and wars/arrows. If he is bugged he won't even move and you can kill him. If you are a melee you will have to try to run in and attack him and run back out. Either way you will need to find the right spot on the ramp as to not have anything spawn back on you and you can focus on the Prior. The all have high MagicD so a Will, Focus or War rare can be your friend!
- The good Prior is vulnerable to Imperil (x7 dmg), and also prone to being bugged at the far end of the fighting hall. Many of the (Vissidal level) moarsman ensconced in side passages cannot jump down the sides of the ramp leading up out of the room by which you enter. The best tactic to use is to lure out all those that can come up the passage, butcher them, then stand at the bottom of the passage out of the range of the survivors, and proceed to use Futility, Imperil and Damage Vulns from afar. If you don't have life magic, use a Royal Runed ranged weapon after you use a Royal Runed Wand to lower his magic defense so he doesn't resist the weapon. If you don't have such a weapon, then Futile him first, and use a Royal Runed melee weapon at fastest speed so you Imperil him as quickly as possible. Then switch to a standard Slash Render (the Silvaran weapons are nice) and cut him down as quickly as possible. If you've done it right, the other moarsmen in the room won't interfere with the fight until he's dead. Loot the staff and recall out as rapidly as possible. Note: he's got 60,000 hit points - you MUST Imperil him to get the fight done in any decent amount of time! Mages, good luck with a crit strike Slash Rending item. Keep the Magic Yield on him to keep his resistance down.
Notes
- The ideal weapon to kill him with, if he is Imped and Vulned, is a Crit Strike weapon. A Silvaran will substitute nicely. Do not use Armor Rending, its effect will be reduced by the Imperil.
- From the time you loot Kothmox's Staff, you have 1 hour to complete Part 2 of the lord test. If you fail, you must obtain the staff again.
- Differs from Retail: The Prior is on a 15 minute respawn (originally 5) in case you are in a group. One staff per spawn.
Part 2: The Riddle
The second part of the quest is slightly different for each faction. The Lord Advancement NPC asks you to bring him a specific item from this quest, which is different for each society (items listed below).
- Depending on the time of day there will be a statue at 87.9S 55.9W west of The Pit of Heretics or east at 87.9S 54.5W, or there may be no statue at all (will have to wait for one to appear). Each statue is surrounded by 3 Coral Hollows.
- Use the West Statue from Evensong to Foredawn and a half (nighttime).
- Use the East Statue Dawnsong to Warmtide and a half (daytime).
- Warning: At the transitions between day and night the statues could be bugged. Try not to the do the riddles when the transition between night and day is occurring (between foredawn and half and dawnsong and between warmtide and a half and evensong).
- Give the Statue the Kothmox's Staff and then talk with it.
- It will give you one of three math riddles. Solve the problem and click on the appropriate coral. Now you are flagged to enter a portal in the side of the wall of the main temple structure (portal looks like a door).
- Brood Mother's Reckoning here for Riddle Answers
- Reefhunter's Reckoning here for Riddle Answers
- Note: Each person gets a different riddle, if you answer incorrectly you will be portaled into the pit in the temple where you should quickly recall to avoid dying. *** You must talk to get a new Riddle on Failure. ***
- Once you solve the riddle, use the corresponding Coral Hollow that matches your answer. You can ID the Coral Hollows to see the answers they represent. If you're correct, a Temple Door (portal) will spawn at the temple @ 87.9S, 55.2W.
- Use the Temple Door quickly, it expires after 5 minutes.
Part 3: Moarsman Gateway Temple
- Once in the Temple, follow the ramps/jumps (East/West) down until you come to a room with a Blind Keeper.
- Kill the Blind Keeper, but be careful, it spawns Listris Sleeches randomly nearby during the fight.
- This can be a lethal fight if you aren't smart. You can see the Keeper from the room above on radar. Proceed to put Magic Yield/Futility on him from on top, then your Imps and Slash Vulns (Frost might work, too). If you don't have life magic, then carry a Royal Runed Weapon to do the job for you. You must Imperil him to have a shot of winning this Test using Melee/Archery. Mages, your best shot is a Crit Strike Slash wand (the Drudge Scrying Orb works fine), casting the Slash Vuln yourself, of course. Remember to keep him Yielded to magic!
- He coughs up the Listris Sleech at a random chance every time he is hit with an attack or spell (similar to what the Burun Kings do). Thus, attacking him at fastest speed can chain-spawn multiple Sleeches and result in a death sentence. The Sleeches fade away after 30 sec to 1 minute, but in that time can easily kill you. Have Dispel Gems or spells ready to deal with the vulns they put on you. Attack the Keeper on Full Power (slowest attack) to minimize the chances a Sleech will spawn. A Silvaran weapon at full power has an excellent chance at killing him without spawning a single Sleech, and can do so before the Imperil wears off. He regenerates slowly enough that if you must re-Yield and re-Imperil him, you can do so without your work being undone. If you must do so with a melee weapon, I recommend using a Black Page of Salt and Ash to up the lousy attack modifier of the Royal Runed melee weapons.
- Note If you attack him in one of the corners, as soon as the Sleech spawns run to the other side keeping the Keepers attention. If you do this fast enough the Sleech won't even get a dispell off on you and won't follow. Head to the opposite corner and repeat once another sleech shows up.
- The ideal weapon to kill him with, if he is Imped and Vulned, is a Crit Strike weapon. A Silvaran will sub nicely. Do not use Armor Rending, it will reduce the effect of the Imperil.
- Once dead, a Gate Watcher will spawn, kill it. This is simply a marginally tougher high level Moarsman.
- Once you've killed him, loot the appropriate item from a dais in the room as required by your society:
- Notes:
- You cannot loot until the Gate Watcher is dead (no grab and go).
- Only one of the items may be looted per Gate Watcher kill.
- Only the player who dealt the most damage / got the kill credit on the Gate Watcher's corpse may loot an item.
- Therefore, if a group of players are attempting the quest, steps may need to be taken to ensure each gets the majority of damage for one kill.
- Once you have the required item, return to your Lord Advancement NPC and hand it to them to complete the test.
- Then talk to the Promotions Officer to receive your rewards and be promoted to Lord.
- You can now access Moarsman City (Nyr'leha) by using the same statue you got the riddle from, using the statue now portals you to 90.8S 52.9W on the island. (The statue can be either at 88.0S 54.5W or at 88.0S 55.5W, the same as before.)
Dungeons & Maps
| Dungeon | Coordinates | Wiki Map | ACmaps |
|---|---|---|---|
| Blighted Verdant Moarsman Tunnels | 92.7N, 42.3W | -- | |
| Moarsmen Priory | N/A | -- | |
| Temple Door | 88.3S, 60.9W | -- |
Rewards
| Complete quest for the Celestial Hand | |
|---|---|
| Experience: | 680,803,762 (20% up to level 275) |
| Items: | |
| Complete quest for the Eldrytch Web | |
|---|---|
| Experience: | 680,803,762 (20% up to level 275) |
| Items: | |
| Complete quest for the Radiant Blood | |
|---|---|
| Experience: | 680,803,762 (20% up to level 275) |
| Items: | |
Images
Click image for full size version.
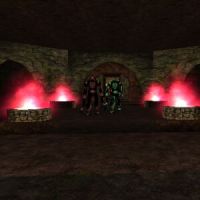
Moarsmen Priory

Prior Kothmox

Sclavus Fort


Dialog
Radiant Blood
- Opening Dialog
- A flicker of steel catches your eye and you feel a sting on your hand. Looking down you see blood begin to trickle from a light cut. Gamri grabs your hand pressing the blood between your palms and stares into your eyes with a fierce intensity.
- Gamri Nightshade tells you, "The Commendations Officer told me you were coming. I am Gamri Nightshade, Inspector of Lords for the Radiant Blood and I have a mission for you."
- Gamri Nightshade tells you, "We are bound by blood now, complete this mission or pay the consequences."
- Gamri Nightshade tells you, "You must gain access to the temple on the Southern Shores near Candeth Keep. Once inside you will recover a relic kept there, the Blood of T'thuun. Our operatives found the Temple where the blood is kept, but they have yet to find an entrance."
- Gamri Nightshade tells you, "I may have some information that you can use. A strange Moarsman wielding a staff has been spotted visiting the temple late at night. He was tracked back to the chilly depths below a Moarsmen Keep before they lost him."
- Gamri Nightshade tells you, "Travel to the Moarsmen Keep near Eastwatch on the North East Halaetan Isles and take what you need from this Moarsman. He must hold some key to entering the temple."
- Gamri Nightshade tells you, "Return to me with the Blood of T'thuun and remember our bond, Knight."
- Showing Moarsman Prior's staff to Gamri Nightshade
- Gamri tilts her head and appraises the Moarsman Prior's staff.
- Gamri Nightshade tells you, "Well done, Knight. I presume you believe the staff holds the key to entering the temple. Now gain access to the temple on the Southern Shores, south-east of Candeth Keep and bring me the Blood of T'thuun."
- Giving Nightshade Blood to Gamri Nightshade
- You give Gamri Nightshade Blood of T'thuun.
- Gamri takes the bottle and places it in a silk lined box engraved with protective runes.
- Gamri clasps your hand and a deep warmth creeps up your arm and grips your heart. A euphoric calm suffuses your tired frame.
- Gamri Nightshade tells you, "Very good, brother. Our Mistress will be most pleased. She will divine much from the blood in this bottle."
- Gamri Nightshade tells you, "You have earned your Lordship, see the Promotions Officer and receive your well earned rewards."
- Promotions Officer
- Promotions Officer tells you, "Congratulations, you have completed the tests of the Lord within our Society. You have been an amazing asset to us, and deserve all of the accolades due to one of your station."
- Promotions Officer tells you, "Now, it is time to honor you as you deserve. Kneel."
- The Promotions Officer declares in a loud, clear voice, "Let all within the Stronghold know that <Player> has achieved the Rank of Lord within our great Society."
- Promotions Officer tells you, "For honor, bravery, and service to our great Society, I do declare you a Lord of our Society. May the Glory of our Society show through in your actions and deeds."
- Promotions Officer gives you 10 Radiant Blood Trade Tokens.
- Your experience has reduced your Vitae penalty!
- You've earned 621,640,262 experience. (Level 212)
- Promotions Officer tells you, "And, as you have not previously achieved this Rank in any Society, I have something extra for you as well."
- Promotions Officer gives you Lord's Treasure Key.
Eldrytch Web
- Opening Dialog
- Istonia Charson tells you, "You have your mission Knight."
- Istonia Charson tells you, "Travel to the Moarsmen Keep near Eastwatch on the North East Halaetan Isles and take the staff from the strange Moarsman hiding there."
- Istonia Charson tells you, "Take the staff to the temple on the Southern Shores, south-east of Candeth Keep, and figure out a way into the temple."
- Istonia Charson tells you, "Bring me back the Dagger of T'thuun from the temple and you will have completed your mission and passed the test."
- Giving Dagger of T'thuun to Istonia Charson
- You give Istonia Charson Dagger of T'thuun.
- Istonia Charson handles the dagger carefully and quickly wraps it in a piece of cloth.
- Istonia Charson tells you, "Well done! You have completed your mission and passed my test."
- Istonia Charson tells you, "Our scholars will confirm if this is the dagger used in a number of horrible sacrifices performed by the Moarsmen as tribute to their dark god T'thuun."
- Istonia Charson tells you, "The Eldrytch Web alone has the knowledge and conviction needed to stop the tide of evil these Moarsmen and the Falatacot Patriarchs wish to unleash on this world."
- Istonia Charson tells you, "You have proven yourself to me and your society, now go to the Promotions Officer and take the glory you deserve my friend."
- Promotions Officer
- Promotions Officer tells you, "Congratulations, you have completed the tests of the Lord within our Society. You have been an amazing asset to us, and deserve all of the accolades due to one of your station."
- Promotions Officer tells you, "Now, it is time to honor you as you deserve. Kneel."
- Promotions Officer tells you, "For honor, bravery, and service to our great Society, I do declare you a Lord of our Society. May the Glory of our Society show through in your actions and deeds."
- The Promotions Officer declares in a loud, clear voice, "Let all within the Stronghold know that <Player> has achieved the Rank of Lord within our great Society."
- Promotions Officer gives you 10 Eldrytch Web Trade Tokens.
- You've earned 680,803,762 experience.
- Promotions Officer tells you, "And, as you have not previously achieved this Rank in any Society, I have something extra for you as well."
- Promotions Officer gives you Lord's Treasure Key.
Celestial Hand
- Opening Dialog
- Philonius Porbandar tells you, "The Commendations Officer told me you were coming. My name is Philonius Porbandar, Inspector of Lords for the Celestial Hand. I have an important mission for you."
- Philonius Porbandar tells you, "Our researchers have discovered the existence of a Moarsman relic called the Amulet of T'thuun. This relic may hold the answers to some important questions about T'thuun."
- Philonius Porbandar tells you, "We believe the relic is being held within a temple on the Southern Shores of the Direlands. Moarsmen have been seen visiting the temple regularly, but one in particular, a Moarsman Prior, seems to hold some means of entering the temple."
- Philonius Porbandar tells you, "This Moarsman Prior has been tracked to a Keep near Eastwatch on the North East Halaetan Isles. Your mission is to find this Moarsman and learn his secret to entering the Temple."
- Philonius Porbandar tells you, "Once you discover his secret travel to the Temple, south east of Candeth Keep, and find the Amulet of T'thuun. Return to me with the amulet and your mission will be complete."
- Giving Amulet of T'thuun to Philonius Porbandar
- Philonius Porbandar clasps his hands in expectation.
- Philonius Porbandar tells you, "Might I assume that you found the Amulet of T'thuun?"
- You give Philonius Porbandar Amulet of T'thuun.
- Philonius Porbandar wraps the amulet in a piece of cloth and places it in a bag.
- Philonius Porbandar tells you, "Well done Knight. I must turn this over to our researchers. They are very eager to study the amulet."
- Philonius Porbandar tells you, "Go to the Promotions Officer now. You have completed your mission and passed the test of Lordship. You will be a worthy addition to the Lords of the Celestial Hand."
- Promotions Officer
- Promotions Officer tells you, "Congratulations, you have completed the tests of the Lord within our Society. You have been an amazing asset to us, and deserve all of the accolades due to one of your station."
- Promotions Officer tells you, "Now, it is time to honor you as you deserve. Kneel."
- Promotions Officer gives you 10 Celestial Hand Trade Tokens.
- You've earned 680,803,762 experience.
- Promotions Officer tells you, "For honor, bravery, and service to our great Society, I do declare you a Lord of our Society. May the Glory of our Society show through in your actions and deeds."
- The Promotions Officer declares in a loud, clear voice, "Let all within the Stronghold know that Tlosk has achieved the Rank of Lord within our great Society."
- Promotions Officer tells you, "And, as you have not previously achieved this Rank in any Society, I have something extra for you as well."
- Promotions Officer gives you Lord's Treasure Key.
- The Riddles
- Statue gives you Brood Mother's Reckoning.
- Statue tells you, "In the Dark Season, 585 spawn were set forth into the pools to be blessed by the Whispering One. During the Dark Season when the spawns were set forth, 2 spawn out of every 5 spawn that were set into the pools were weak and destroyed by their siblings. Of those strong spawn that survived, for every 3 spawn that remained in the pools, the Whispering One demanded 2 be sacrificed to his glory."
- Statue tells you, "Know how many spawn survived and you will know where the staff must be placed."
- Statue gives you Brood Mother's Reckoning.
- The statues eyes appear to grow and encompass all that you see. They peer into your mind.
- Statue tells you, "In the Dark Season, 343 spawn were set forth into the pools to be blessed by the Whispering One. During the Dark Season when the spawns were set forth, 5 spawn out of every 7 spawn that were set into the pools were weak and destroyed by their siblings. Of those strong spawn that survived, for every 7 spawn that remained in the pools, the Whispering One demanded 4 be sacrificed to his glory."
- Statue tells you, "Know how many spawn survived and you will know where the staff must be placed."
- Statue gives you Brood Mother's Reckoning
- You hand over all of your Kothmox's Staffs.
- Kothmox's staff fits into the hollow with a click. The staff glows brightly and a beam of light flashes out and hits the west side of the temple, revealing a door there.
Update History
|