Difference between revisions of "Glenden Wood Dungeon Quest"
(complete rework of guide.) |
m (→Update History) |
||
| Line 155: | Line 155: | ||
* Banderling Ogre's appearance updated. | * Banderling Ogre's appearance updated. | ||
* Platemail Hauberk's color changed from silver to purple. | * Platemail Hauberk's color changed from silver to purple. | ||
| − | * | + | * Glenden Wood Dungeon updated. |
[[Reforging the Past]] | [[Reforging the Past]] | ||
| Line 163: | Line 163: | ||
* Platemail Hauberk renamed to Platemail Hauberk of the Ogre. | * Platemail Hauberk renamed to Platemail Hauberk of the Ogre. | ||
* Platemail Hauberk of the Ogre stats updated. | * Platemail Hauberk of the Ogre stats updated. | ||
| − | * | + | * Glenden Wood Dungeon updated. |
[[Filling in the Blanks]] | [[Filling in the Blanks]] | ||
| Line 173: | Line 173: | ||
* Platemail Hauberk of the Ogre's color changed from purple to silver. | * Platemail Hauberk of the Ogre's color changed from purple to silver. | ||
* New rewards introduced: Banderling Board with Nail, Glenden Wood Pants, Glenden Wood Shirt, Metal Cap of the Ogre, Tiofor Longbow, Tiofor Staff. | * New rewards introduced: Banderling Board with Nail, Glenden Wood Pants, Glenden Wood Shirt, Metal Cap of the Ogre, Tiofor Longbow, Tiofor Staff. | ||
| + | * Glenden Wood Dungeon updated. | ||
}} | }} | ||
[[Category:Quests: Lockpick Optional]] | [[Category:Quests: Lockpick Optional]] | ||
Revision as of 19:10, 26 March 2025
| Verified This page has been verified to match the content available on Levistras. |
| Walkthrough & Notes Dungeons & Maps Rewards Images Dialog Update History |
| Glenden Wood Dungeon Quest | |
|---|---|
| Required Level: | Any |
| Type: | Solo |
| Starts At: | 30.0N, 26.4E in Glenden Wood Dungeon |
| Route: | Glenden Wood |
| Repeat: | None |
Overview
Custom: This quest has been updated with new reward items.
One of the oldest quests in the game, this quest involves collecting a series of keys which will unlock doors leading to the Oversized Banderling Ogre.
If you have the lockpick skill you do not need any of the keys - highest lock is 162 resistance. See the lockpick guide below.
Gathering the Plain-Looking Key and Rusty Key (steps 1 and 2) are technically not required, as the Large Silver Rat can be killed through the door, and you can loot its body without needing to open the door.
Walkthrough & Notes
Lockpick Guide
If you have lockpick, follow this guide. Otherwise, proceed to step 1 of the full guide.
- From the drop, go to the northwest corner of the room and enter the hallway. Follow the hallway to a room with two desks, and go through the open doorway to the right (north).
- Go through the long diagonal room that has two hallways at the end. Take the passage on the right (north).
- Go straight through the hallway (ignore the first hallway to the right). You will enter a dining hall area. From this large room, take the west exit at the opposite end of the room.
- In the hallway, take the first right (north). At the four-way intersection, go straight (east) through the wide hall with prison cells.
- At the other end of the hall is another four-way intersection. Go straight (east). Go through a small room to reach a three-way intersection, with a cell in front of you. Go left (north).
- Use lockpick to unlock the second door (resistance: 142) on your right (east). Behind the door is a cell containing a lich, and another locked door (resistance: 162). Unlock the second door and proceed through the hallway.
- You will enter the treasure room. While here, you can use lockpick to open any (or all) of the three chests (resistance: 150): Archer's Chest, Clothier's Chest, or Mage's Chest.
- From the treasure room, take the hallway on the east. You will go up and down a somewhat long corridor. Once you meet some rooms at the end, go north and then west into the room with the Oversized Banderling Ogre.
- Kill the Ogre and loot his treasures:
- Platemail Hauberk of the Ogre x3
- Metal Cap of the Ogre x3
- Banderling Board with Nail x3
- You do not need to loot the Treasure Chest Key if you already picked the chests.
You've now obtained all the reward items from this quest.
Step 1: Plain-Looking Key
- From the drop, go to the northwest corner of the room and enter the hallway. Follow the hallway to a room with two desks, and go through the open doorway to the right (north).
- Go through the long diagonal room that has two hallways at the end. Take the passage on the right (north).
- Go straight through the hallway (ignore the first hallway to the right). You will enter a dining hall area. From this large room, take the west exit at the opposite end of the room.
- Continue west, ignoring the first hall to the right. Open a wooden door and enter a room containing a desk and a pulpit with benches. Take the western hall.
- Conintue west again, ignoring the first hall to the left. Open a wooden door and enter a room with three Drudges, one of which is a Drudge Hoarder, kill it for the Plain-Looking Key.
Step 2: Rusty Key
- Head back into the room with the pulpit and benches and go north. Straight forward you will find a locked wooden door (resistance: 100). Unlock this with the Plain-Looking Key.
- Go up the stairs to a small room overlooking an area with two Liches and a Banderling Bloodblade locked inside a room directly beneath you.
- Jump down whilst taking care as the Liches cast spells that could kill a lower level character.
- Dispatch the Liches and unlock the door (resistance: 100) to the Bloodblade, kill it and loot the Rusty Key.
Step 3: Antique Key
- Exit the lich room through the south door and go left heading east into the prison cells section of the dungeon.
- At the first four-way intersection, go right (south). The second cell to your right has a strangely Large Silver Rat. Unlock the door (resistance: 82) with the rusty key and kill it for the Antique Key.
Step 4: The Oversized Banderling Ogre
- Return to the four-way intersection. This time go right (east). Go through a small room to reach a three-way intersection, with a cell in front of you. Go right (south).
- Continue south to the end of the corridor. Unlock the door (resistance: 142) with the Antique Key. Head south and proceed down a long winding ramp leading to the cave area of the dungeon.
- Straight forward is a three-way intersection. Go right (east) here to immediately reach a four-way intersection.
- Optional: From here you can go straight forward (east) to collect the Alloy Tool if you wish.
- At the four-way intersection, take the right (south) to proceed. You will go through a small room with a golem, and then back up another long winding ramp. At the end of the ramp is the treasure room.
- From the treasure room, take the hallway on the east. You will go up and down a somewhat long corridor. Once you meet some rooms at the end, go north and then west into the room with the Oversized Banderling Ogre.
- Kill the Ogre and loot his treasures:
- Take the Treasure Chest Key and return to the treasure room. Use the key to unlock any of the three chests (resistance: 150): Archer's Chest, Clothier's Chest, or Mage's Chest.
- Return to the Facility Hub and show the hauberk to the correct Warden for your reward.
Dungeons & Maps
| Dungeon | Coordinates | Wiki Map | ACmaps |
|---|---|---|---|
| Glenden Wood Dungeon | 30.0N, 26.4E | -- | 01E3 |
Rewards
| Kill and Loot the Oversized Banderling Ogre | |
|---|---|
| Items: | |
| Open the Archer's Chest with the Treasure Chest Key | |
|---|---|
| Items: | |
| |
| Open the Clothier's Chest with the Treasure Chest Key | |
|---|---|
| Items: | |
| Open the Mages's Chest with the Treasure Chest Key | |
|---|---|
| Items: | |
Show any of the reward items to the Warden | |
|---|---|
| Experience: | 100,000 (Fixed) |
Images
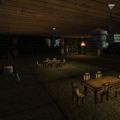
Dining area
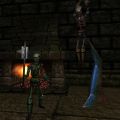
Lich
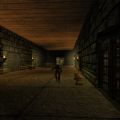
The dungeon cells
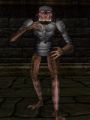
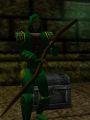
Oversized Banderling Ogre
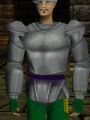
Platemail Hauberk of the Ogre
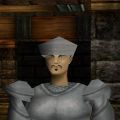
Metal Cap of the Ogre
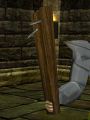
Banderling Board with Nail
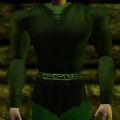
Glenden Wood Shirt
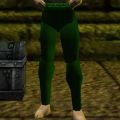
Glenden Wood Pants

Tiofor Longbow
Tiofor Staff


Dialog
- Facility Hub Warden
- Warden tells you, "There's a long standing dungeon near the town of Glendon Wood. This dungeon is overrun by creatures that were once contained in its cells."
- Warden tells you, "This will be the greatest dungeoneering challange you've faced yet. You'll need to find creatures that hold the keys or lockpick the doors yourself."
- Warden tells you, "Fight your way through the dungeon and find the Oversized Banderling Ogre. Kill it and recover its Platemail Hauberk."
- Warden tells you, "The portal behind me will take you to Glendon Wood outside the dungeon. Find the Hauberk in the dungeon and return to me with it."
- Showing Platemail Hauberk of the Ogre to the Warden (Bonus Reward)
- You allow Warden to examine your Platemail Hauberk of the Ogre.
- You've earned 100,000 experience.
- Warden tells you, "Ha! I as I thought you were very capable and I'm sure you completed this task with ease. This is a very nice piece of armor, keep it if you can make use of it."
- Warden tells you, "If you have no use for it I'm sure a shopkeep would be willing to offer you a small stack of pyreals in exchange for it."
Update History
Custom: Auroch and a Hard Place
|