Difference between revisions of "Glenden Wood Dungeon Quest"
Jump to navigation
Jump to search
(complete rework of guide.) |
|||
| Line 11: | Line 11: | ||
}} | }} | ||
== Overview == | == Overview == | ||
| − | This quest | + | {{Custom Note}} This quest has been updated with new reward items. |
| − | + | One of the oldest quests in the game, this quest involves collecting a series of keys which will unlock doors leading to the [[Oversized Banderling Ogre]]. | |
| + | |||
| + | If you have the lockpick skill you do not need any of the keys - highest lock is 162 resistance. See the lockpick guide below. | ||
| + | |||
| + | Gathering the Plain-Looking Key and Rusty Key (steps 1 and 2) are technically not required, as the Large Silver Rat can be killed through the door, and you can loot its body without needing to open the door. | ||
== Walkthrough & Notes == | == Walkthrough & Notes == | ||
| + | === Lockpick Guide === | ||
| + | If you have lockpick, follow this guide. Otherwise, proceed to step 1 of the full guide. | ||
| + | # From the drop, go to the northwest corner of the room and enter the hallway. Follow the hallway to a room with two desks, and go through the open doorway to the right (north). | ||
| + | # Go through the long diagonal room that has two hallways at the end. Take the passage on the right (north). | ||
| + | # Go straight through the hallway (ignore the first hallway to the right). You will enter a dining hall area. From this large room, take the west exit at the opposite end of the room. | ||
| + | # In the hallway, take the first right (north). At the four-way intersection, go straight (east) through the wide hall with prison cells. | ||
| + | # At the other end of the hall is another four-way intersection. Go straight (east). Go through a small room to reach a three-way intersection, with a cell in front of you. Go left (north). | ||
| + | # Use lockpick to unlock the second door (resistance: 142) on your right (east). Behind the door is a cell containing a lich, and another locked door (resistance: 162). Unlock the second door and proceed through the hallway. | ||
| + | # You will enter the ''treasure room''. While here, you can use lockpick to open any (or all) of the three chests (resistance: 150): [[Archer's Chest]], [[Clothier's Chest]], or [[Mage's Chest]]. | ||
| + | # From the treasure room, take the hallway on the east. You will go up and down a somewhat long corridor. Once you meet some rooms at the end, go north and then west into the room with the [[Oversized Banderling Ogre]]. | ||
| + | # Kill the Ogre and loot his treasures: | ||
| + | #* {{Itemlink|Platemail Hauberk of the Ogre}} x3 | ||
| + | #* {{Itemlink|Metal Cap of the Ogre}} x3 | ||
| + | #* {{Itemlink|Banderling Board with Nail}} x3 | ||
| + | #* You do not need to loot the Treasure Chest Key if you already picked the chests. | ||
| + | |||
| + | You've now obtained all the reward items from this quest. | ||
| + | |||
=== Step 1: Plain-Looking Key === | === Step 1: Plain-Looking Key === | ||
| − | # From the drop go northwest and | + | # From the drop, go to the northwest corner of the room and enter the hallway. Follow the hallway to a room with two desks, and go through the open doorway to the right (north). |
| − | # | + | # Go through the long diagonal room that has two hallways at the end. Take the passage on the right (north). |
| − | # Continue west | + | # Go straight through the hallway (ignore the first hallway to the right). You will enter a ''dining hall'' area. From this large room, take the west exit at the opposite end of the room. |
| − | # | + | # Continue west, ignoring the first hall to the right. Open a wooden door and enter a room containing a desk and a pulpit with benches. Take the western hall. |
| + | # Conintue west again, ignoring the first hall to the left. Open a wooden door and enter a room with three Drudges, one of which is a [[Drudge Hoarder]], kill it for the {{Itemlink|Key (Plain-Looking)|Plain-Looking Key}}. | ||
=== Step 2: Rusty Key === | === Step 2: Rusty Key === | ||
| − | # Head back into the room with the benches and | + | # Head back into the room with the pulpit and benches and go north. Straight forward you will find a locked wooden door (resistance: 100). Unlock this with the Plain-Looking Key. |
| − | # Go up the stairs to a small room overlooking an area with two [[Lich]] | + | # Go up the stairs to a small room overlooking an area with two [[Lich]]es and a [[Banderling Bloodblade]] locked inside a room directly beneath you. |
| − | # Jump down whilst taking care as the | + | # Jump down whilst taking care as the Liches cast spells that could kill a lower level character. |
| − | # Dispatch the | + | # Dispatch the Liches and unlock the door (resistance: 100) to the Bloodblade, kill it and loot the {{Itemlink|Key (Rusty Key)|Rusty Key}}. |
=== Step 3: Antique Key === | === Step 3: Antique Key === | ||
| − | # Exit | + | # Exit the lich room through the south door and go left heading east into the prison cells section of the dungeon. |
| − | # | + | # At the first four-way intersection, go right (south). The second cell to your right has a strangely [[Large Silver Rat]]. Unlock the door (resistance: 82) with the rusty key and kill it for the {{Itemlink|Key (Antique Key)|Antique Key}}. |
| − | |||
=== Step 4: The Oversized Banderling Ogre === | === Step 4: The Oversized Banderling Ogre === | ||
| − | # Return to the | + | # Return to the four-way intersection. This time go right (east). Go through a small room to reach a three-way intersection, with a cell in front of you. Go right (south). |
| − | + | # Continue south to the end of the corridor. Unlock the door (resistance: 142) with the Antique Key. Head south and proceed down a long winding ramp leading to the ''cave area'' of the dungeon. | |
| − | # | + | # Straight forward is a three-way intersection. Go right (east) here to immediately reach a four-way intersection. |
| − | # You | + | #* {{Optional}} From here you can go straight forward (east) to collect the [[Alloy Tool]] if you wish. |
| − | # Kill the Ogre and loot | + | # At the four-way intersection, take the right (south) to proceed. You will go through a small room with a golem, and then back up another long winding ramp. At the end of the ramp is the ''treasure room''. |
| − | # | + | # From the treasure room, take the hallway on the east. You will go up and down a somewhat long corridor. Once you meet some rooms at the end, go north and then west into the room with the [[Oversized Banderling Ogre]]. |
| − | + | # Kill the Ogre and loot his treasures: | |
| + | #* {{Itemlink|Platemail Hauberk of the Ogre}} x3 | ||
| + | #* {{Itemlink|Metal Cap of the Ogre}} x3 | ||
| + | #* {{Itemlink|Banderling Board with Nail}} x3 | ||
| + | #* {{Itemlink|Treasure Chest Key (Glenden Wood Dungeon)|Treasure Chest Key}} x9 | ||
| + | # Take the Treasure Chest Key and return to the ''treasure room''. Use the key to unlock any of the three chests (resistance: 150): [[Archer's Chest]], [[Clothier's Chest]], or [[Mage's Chest]]. | ||
| + | # Return to the [[Facility Hub]] and show the hauberk to the correct Warden for your reward. | ||
== Dungeons & Maps == | == Dungeons & Maps == | ||
| Line 55: | Line 83: | ||
== Rewards == | == Rewards == | ||
{{Rewards Table | {{Rewards Table | ||
| − | | Quest Task = | + | | Quest Task = Kill and Loot the Oversized Banderling Ogre |
| Item Reward = | | Item Reward = | ||
* {{Itemlink|Platemail Hauberk of the Ogre|Mode=icon}} | * {{Itemlink|Platemail Hauberk of the Ogre|Mode=icon}} | ||
| − | + | * {{Itemlink|Metal Cap of the Ogre|Mode=icon}} | |
| − | | | + | * {{Itemlink|Banderling Board with Nail|Mode=icon}} |
| − | | | + | * {{Itemlink|Treasure Chest Key (Glenden Wood Dungeon)|Treasure Chest Key|Mode=icon}} |
| − | + | }} | |
| − | + | {{Rewards Table | |
| + | | Quest Task = Open the Archer's Chest with the Treasure Chest Key | ||
| + | | Item Reward = | ||
| + | * {{Itemlink|Tiofor Longbow|Mode=icon}} | ||
| + | * {{Itemlink|Fire Arrow|Mode=icon}} x 250 | ||
| + | }} | ||
| + | {{Rewards Table | ||
| + | | Quest Task = Open the Clothier's Chest with the Treasure Chest Key | ||
| + | | Item Reward = | ||
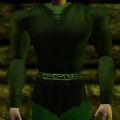
| + | * {{Itemlink|Glenden Wood Shirt|Mode=icon}} | ||
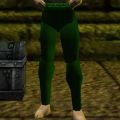
| + | * {{Itemlink|Glenden Wood Pants|Mode=icon}} | ||
}} | }} | ||
| − | |||
{{Rewards Table | {{Rewards Table | ||
| − | | | + | | Quest Task = Open the Mages's Chest with the Treasure Chest Key |
| Item Reward = | | Item Reward = | ||
| − | + | * {{Itemlink|Tiofor Staff|Mode=icon}} | |
| − | | | + | * {{Itemlink|High Mana Charge|Mode=icon}} |
| − | | | + | * {{Itemlink|Prismatic Taper|Mode=icon}} x 50 |
| − | | | + | }} |
| − | | | + | {{Rewards Table |
| + | | Hub Bonus = Facility Hub Bonus (Level 10+):<br />Show any of the reward items to the [[Warden (Glenden Wood)|Warden]] | ||
| + | | Max XP Reward = 100,000 | ||
| + | | Percent of Level = Fixed | ||
| + | | Level Cap = Fixed | ||
}} | }} | ||
== Images == | == Images == | ||
| − | <gallery | + | <gallery> |
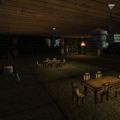
File:Glenden Wood Dungeon Live 2.jpg|Dining area | File:Glenden Wood Dungeon Live 2.jpg|Dining area | ||
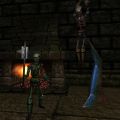
File:Glenden Wood Dungeon Live 3.jpg|Lich | File:Glenden Wood Dungeon Live 3.jpg|Lich | ||
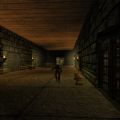
File:Glenden Wood Dungeon Live 4.jpg|The dungeon cells | File:Glenden Wood Dungeon Live 4.jpg|The dungeon cells | ||
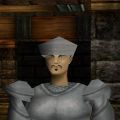
| + | File:Oversized Banderling Ogre Live.jpg|Oversized Banderling Ogre | ||
| + | File:Platemail Hauberk of the Ogre Live.jpg|Platemail Hauberk of the Ogre | ||
| + | File:Metal Cap of the Ogre Live.jpg|Metal Cap of the Ogre | ||
| + | File:Banderling Board with Nail Live.jpg|Banderling Board with Nail | ||
| + | File:Glenden Wood Shirt Live.jpg|Glenden Wood Shirt | ||
| + | File:Glenden Wood Pants Live.jpg|Glenden Wood Pants | ||
| + | File:Tiofor Longbow Live.jpg|Tiofor Longbow | ||
| + | File:Tiofor Staff Live.jpg|Tiofor Staff | ||
</gallery> | </gallery> | ||
| Line 103: | Line 152: | ||
[[Reign of Terror]] | [[Reign of Terror]] | ||
| − | * | + | * Banderling Guard renamed to Banderling Ogre. |
| + | * Banderling Ogre's appearance updated. | ||
| + | * Platemail Hauberk's color changed from silver to purple. | ||
* [[Glenden Wood Dungeon]] updated. | * [[Glenden Wood Dungeon]] updated. | ||
[[Reforging the Past]] | [[Reforging the Past]] | ||
| − | * | + | * Quest updated to be part of the [[Facility Hub Quests]]. |
| − | * | + | * Banderling Ogre renamed to Oversived Banderling Ogre. |
| + | * Oversived Banderling Ogre's appearance updated. | ||
| + | * Platemail Hauberk renamed to Platemail Hauberk of the Ogre. | ||
| + | * Platemail Hauberk of the Ogre stats updated. | ||
* [[Glenden Wood Dungeon]] updated. | * [[Glenden Wood Dungeon]] updated. | ||
[[Filling in the Blanks]] | [[Filling in the Blanks]] | ||
* Oversized Banderling Ogre respawn timer reduced to 3 minutes. | * Oversized Banderling Ogre respawn timer reduced to 3 minutes. | ||
| + | |||
| + | {{Custom Note}} [[Auroch and a Hard Place]] | ||
| + | * Oversived Banderling Ogre's appearance, trophies, and death messages all updated. | ||
| + | * Platemail Hauberk of the Ogre stats updated. | ||
| + | * Platemail Hauberk of the Ogre's color changed from purple to silver. | ||
| + | * New rewards introduced: Banderling Board with Nail, Glenden Wood Pants, Glenden Wood Shirt, Metal Cap of the Ogre, Tiofor Longbow, Tiofor Staff. | ||
}} | }} | ||
| + | |||
| + | [[Category:Quests: Lockpick Optional]] | ||
Revision as of 16:30, 26 March 2025
| Verified This page has been verified to match the content available on Levistras. |
| Walkthrough & Notes Dungeons & Maps Rewards Images Dialog Update History |
| Glenden Wood Dungeon Quest | |
|---|---|
| Required Level: | Any |
| Type: | Solo |
| Starts At: | 30.0N, 26.4E in Glenden Wood Dungeon |
| Route: | Glenden Wood |
| Repeat: | None |
Overview
Custom: This quest has been updated with new reward items.
One of the oldest quests in the game, this quest involves collecting a series of keys which will unlock doors leading to the Oversized Banderling Ogre.
If you have the lockpick skill you do not need any of the keys - highest lock is 162 resistance. See the lockpick guide below.
Gathering the Plain-Looking Key and Rusty Key (steps 1 and 2) are technically not required, as the Large Silver Rat can be killed through the door, and you can loot its body without needing to open the door.
Walkthrough & Notes
Lockpick Guide
If you have lockpick, follow this guide. Otherwise, proceed to step 1 of the full guide.
- From the drop, go to the northwest corner of the room and enter the hallway. Follow the hallway to a room with two desks, and go through the open doorway to the right (north).
- Go through the long diagonal room that has two hallways at the end. Take the passage on the right (north).
- Go straight through the hallway (ignore the first hallway to the right). You will enter a dining hall area. From this large room, take the west exit at the opposite end of the room.
- In the hallway, take the first right (north). At the four-way intersection, go straight (east) through the wide hall with prison cells.
- At the other end of the hall is another four-way intersection. Go straight (east). Go through a small room to reach a three-way intersection, with a cell in front of you. Go left (north).
- Use lockpick to unlock the second door (resistance: 142) on your right (east). Behind the door is a cell containing a lich, and another locked door (resistance: 162). Unlock the second door and proceed through the hallway.
- You will enter the treasure room. While here, you can use lockpick to open any (or all) of the three chests (resistance: 150): Archer's Chest, Clothier's Chest, or Mage's Chest.
- From the treasure room, take the hallway on the east. You will go up and down a somewhat long corridor. Once you meet some rooms at the end, go north and then west into the room with the Oversized Banderling Ogre.
- Kill the Ogre and loot his treasures:
- Platemail Hauberk of the Ogre x3
- Metal Cap of the Ogre x3
- Banderling Board with Nail x3
- You do not need to loot the Treasure Chest Key if you already picked the chests.
You've now obtained all the reward items from this quest.
Step 1: Plain-Looking Key
- From the drop, go to the northwest corner of the room and enter the hallway. Follow the hallway to a room with two desks, and go through the open doorway to the right (north).
- Go through the long diagonal room that has two hallways at the end. Take the passage on the right (north).
- Go straight through the hallway (ignore the first hallway to the right). You will enter a dining hall area. From this large room, take the west exit at the opposite end of the room.
- Continue west, ignoring the first hall to the right. Open a wooden door and enter a room containing a desk and a pulpit with benches. Take the western hall.
- Conintue west again, ignoring the first hall to the left. Open a wooden door and enter a room with three Drudges, one of which is a Drudge Hoarder, kill it for the Plain-Looking Key.
Step 2: Rusty Key
- Head back into the room with the pulpit and benches and go north. Straight forward you will find a locked wooden door (resistance: 100). Unlock this with the Plain-Looking Key.
- Go up the stairs to a small room overlooking an area with two Liches and a Banderling Bloodblade locked inside a room directly beneath you.
- Jump down whilst taking care as the Liches cast spells that could kill a lower level character.
- Dispatch the Liches and unlock the door (resistance: 100) to the Bloodblade, kill it and loot the Rusty Key.
Step 3: Antique Key
- Exit the lich room through the south door and go left heading east into the prison cells section of the dungeon.
- At the first four-way intersection, go right (south). The second cell to your right has a strangely Large Silver Rat. Unlock the door (resistance: 82) with the rusty key and kill it for the Antique Key.
Step 4: The Oversized Banderling Ogre
- Return to the four-way intersection. This time go right (east). Go through a small room to reach a three-way intersection, with a cell in front of you. Go right (south).
- Continue south to the end of the corridor. Unlock the door (resistance: 142) with the Antique Key. Head south and proceed down a long winding ramp leading to the cave area of the dungeon.
- Straight forward is a three-way intersection. Go right (east) here to immediately reach a four-way intersection.
- Optional: From here you can go straight forward (east) to collect the Alloy Tool if you wish.
- At the four-way intersection, take the right (south) to proceed. You will go through a small room with a golem, and then back up another long winding ramp. At the end of the ramp is the treasure room.
- From the treasure room, take the hallway on the east. You will go up and down a somewhat long corridor. Once you meet some rooms at the end, go north and then west into the room with the Oversized Banderling Ogre.
- Kill the Ogre and loot his treasures:
- Take the Treasure Chest Key and return to the treasure room. Use the key to unlock any of the three chests (resistance: 150): Archer's Chest, Clothier's Chest, or Mage's Chest.
- Return to the Facility Hub and show the hauberk to the correct Warden for your reward.
Dungeons & Maps
| Dungeon | Coordinates | Wiki Map | ACmaps |
|---|---|---|---|
| Glenden Wood Dungeon | 30.0N, 26.4E | -- | 01E3 |
Rewards
| Kill and Loot the Oversized Banderling Ogre | |
|---|---|
| Items: | |
| Open the Archer's Chest with the Treasure Chest Key | |
|---|---|
| Items: | |
| |
| Open the Clothier's Chest with the Treasure Chest Key | |
|---|---|
| Items: | |
| Open the Mages's Chest with the Treasure Chest Key | |
|---|---|
| Items: | |
| Facility Hub Bonus (Level 10+): Show any of the reward items to the Warden | |
|---|---|
| Experience: | 100,000 (Fixed) |
Images
Dialog
- Facility Hub Warden
- Warden tells you, "There's a long standing dungeon near the town of Glendon Wood. This dungeon is overrun by creatures that were once contained in its cells."
- Warden tells you, "This will be the greatest dungeoneering challange you've faced yet. You'll need to find creatures that hold the keys or lockpick the doors yourself."
- Warden tells you, "Fight your way through the dungeon and find the Oversized Banderling Ogre. Kill it and recover its Platemail Hauberk."
- Warden tells you, "The portal behind me will take you to Glendon Wood outside the dungeon. Find the Hauberk in the dungeon and return to me with it."
- Showing Platemail Hauberk of the Ogre to the Warden (Bonus Reward)
- You allow Warden to examine your Platemail Hauberk of the Ogre.
- You've earned 100,000 experience.
- Warden tells you, "Ha! I as I thought you were very capable and I'm sure you completed this task with ease. This is a very nice piece of armor, keep it if you can make use of it."
- Warden tells you, "If you have no use for it I'm sure a shopkeep would be willing to offer you a small stack of pyreals in exchange for it."
Update History
Custom: Auroch and a Hard Place
|
