Category:Live Images
Jump to navigation
Jump to search
Media in category "Live Images"
The following 200 files are in this category, out of 17,704 total.
(previous page) (next page) 35.1N, 17.8W - Fort Morntide Live 3.jpg 300 × 300; 26 KB
 35.1N, 17.8W - Fort Morntide Live 4.jpg ; 11 bytes
 35.1N, 17.8W - Fort Morntide Live.jpg 300 × 300; 19 KB
 35.1S, 60.5E - Peddler and Lifestone Live 2.jpg 400 × 400; 32 KB
 35.1S, 60.5E - Peddler and Lifestone Live.jpg 400 × 400; 31 KB
 35.2N, 27.1W - Villas Live.jpg 300 × 300; 21 KB
 35.4S, 68.1E - Golem Cave Live.jpg 250 × 250; 15 KB
 35.7N, 32.7E - Rat Bunker Live.jpg 250 × 250; 18 KB
 35.7N, 33.4E - Eldrista's House Live.jpg 400 × 300; 39 KB
 35.9N, 59.7E - Mite Bunker Live.jpg 300 × 300; 23 KB
 36.0N, 61.7E - Cottages Live.jpg 300 × 300; 24 KB
 36.0S, 44.3E - Empyrean Ruins and Lifestone Live 2.jpg 400 × 400; 43 KB
 36.0S, 44.3E - Empyrean Ruins and Lifestone Live 3.jpg 400 × 400; 43 KB
 36.0S, 44.3E - Empyrean Ruins and Lifestone Live 4.jpg 400 × 400; 37 KB
 36.0S, 44.3E - Empyrean Ruins and Lifestone Live.jpg 400 × 400; 38 KB
 36.1S, 81.0W - Shadow Bunker Live 2.jpg 400 × 400; 31 KB
 36.1S, 81.0W - Shadow Bunker Live.jpg 400 × 400; 44 KB
 36.2N, 39.5E - Banderling Camp Live.jpg 250 × 250; 14 KB
 36.2N, 51.7W - Villa Live 2.jpg 300 × 300; 15 KB
 36.2N, 51.7W - Villa Live.jpg 300 × 300; 23 KB
 36.2S, 54.4E - Banderling Camp Live.jpg 300 × 300; 34 KB
 36.3S, 61.2E - Mosswart Cave Live 2.jpg 400 × 400; 31 KB
 36.3S, 61.2E - Mosswart Cave Live 3.jpg 400 × 400; 45 KB
 36.3S, 61.2E - Mosswart Cave Live.jpg 400 × 400; 43 KB
 36.4S, 18.4E - Ritual Stones Live 2.jpg 400 × 400; 22 KB
 36.4S, 18.4E - Ritual Stones Live.jpg 400 × 400; 31 KB
 36.5S, 16.7E - Empyrean Stone Heads Live 2.jpg 400 × 400; 27 KB
 36.5S, 16.7E - Empyrean Stone Heads Live 3.jpg 400 × 400; 22 KB
 36.5S, 16.7E - Empyrean Stone Heads Live.jpg 400 × 400; 31 KB
 36.6S, 77.6E - Drudge Temple Live.jpg 400 × 300; 37 KB
 36.7N, 29.1E - Shrine and Portal to Glenden Wood Live 2.jpg 300 × 300; 26 KB
 36.7N, 29.1E - Shrine and Portal to Glenden Wood Live.jpg 300 × 300; 33 KB
 36.9N, 35.1E - Drudge Cave Live 2.jpg 457 × 417; 29 KB
 36.9N, 35.1E - Drudge Cave Live.jpg 459 × 296; 21 KB
 36.9N, 47.1E - Monster Training Camp Live 2.jpg 400 × 400; 47 KB
 36.9N, 47.1E - Monster Training Camp Live 3.jpg 400 × 400; 39 KB
 36.9N, 47.1E - Monster Training Camp Live.jpg 400 × 400; 54 KB
 37.4S, 64.2E - Hilltop Golems Live.jpg 300 × 300; 19 KB
 37.7N, 1.3W - Archmage Lifestone Live 2.jpg 400 × 400; 38 KB
 37.7N, 1.3W - Archmage Lifestone Live.jpg 400 × 400; 38 KB
 37.7N, 29.0E - Hedged Platform Live 2.jpg 400 × 300; 43 KB
 37.7N, 29.0E - Hedged Platform Live.jpg 400 × 300; 38 KB
 37.8S, 72.6E - Abandoned Sho Building Live.jpg 400 × 300; 30 KB
 38.1N, 31.4E - Two Columns Live.jpg 400 × 300; 46 KB
 38.1N, 56.6E - Mite Cave Live 2.jpg 400 × 400; 53 KB
 38.1N, 56.6E - Mite Cave Live 3.jpg 400 × 400; 34 KB
 38.1N, 56.6E - Mite Cave Live.jpg 400 × 400; 44 KB
 38.1S, 47.3W - Kivik Lir's Temple Live.jpg 300 × 300; 35 KB
 38.2N, 7.1E - Banderling Tower Live 2.jpg 400 × 400; 39 KB
 38.2N, 7.1E - Banderling Tower Live.jpg 400 × 400; 37 KB
 38.2S, 68.4E - Farmer's Herd Live.jpg 400 × 300; 28 KB
 38.3N, 31.5E - Abandoned Aluvian Building Live.jpg 400 × 300; 39 KB
 38.3N, 52.6E - Cottage Live 2.jpg 300 × 300; 25 KB
 38.3N, 52.6E - Cottage Live.jpg 300 × 300; 21 KB
 38.3S, 34.5E - Lightning Elemental Crystal Live.jpg 300 × 300; 24 KB
 38.4N, 24.1E - Villas Live.jpg 300 × 300; 25 KB
 38.5S, 70.2E - Rat Cave Live.jpg 250 × 250; 24 KB
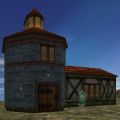
 38.6N, 30.4E - Weaponsmith's House Live.jpg 300 × 300; 27 KB
 38.8N, 36.8E - Golem Spire Live.jpg 400 × 300; 31 KB
 38.8N, 61.4E - Mite House Live.jpg 538 × 351; 29 KB
 39.0N, 35.8E - Empty Cave 2 Live.jpg 300 × 300; 20 KB
 39.0N, 35.8E - Empty Cave Live.jpg 250 × 250; 21 KB
 39.1N, 40.0W - Cottage Live 2.jpg 300 × 300; 19 KB
 39.1N, 40.0W - Cottage Live.jpg 300 × 300; 22 KB
 39.2S, 63.5E - Shreth Gathering Live.jpg 250 × 250; 20 KB
 39.2S, 77.2E - Abandoned Sho Building Live.jpg 400 × 300; 45 KB
 39.3N, 36.7E - Wasp Swarm Live.jpg 250 × 250; 20 KB
 39.3S, 11.5E - Burun Oasis Live 2.jpg 400 × 400; 45 KB
 39.3S, 11.5E - Burun Oasis Live.jpg 400 × 400; 38 KB
 39.4N, 20.9E - Cottage Live 2.jpg 300 × 300; 17 KB
 39.4N, 20.9E - Cottage Live.jpg 300 × 300; 29 KB
 39.4S, 84.9E - Strange Giant Flower Live.jpg 300 × 300; 27 KB
 39.5N, 30.3E - Abandoned Barn Live 2.jpg 400 × 300; 34 KB
 39.5N, 30.3E - Abandoned Barn Live.jpg 300 × 300; 28 KB
 39.8N, 37.8E - Drudge Gathering Live.jpg 250 × 250; 21 KB
 4.0S, 18.7E - Drudge House Live.jpg 600 × 300; 43 KB
 4.0S, 19.0E - Samsur Watering Hole Live 2.jpg 600 × 300; 48 KB
 4.0S, 19.0E - Samsur Watering Hole Live.jpg 600 × 300; 43 KB
 4.3N, 63.9W - Lifestone Tower Live 2.jpg 400 × 400; 21 KB
 4.3N, 63.9W - Lifestone Tower Live.jpg 400 × 400; 29 KB
 4.4N, 63.0E - River Crossing Live.jpg 400 × 300; 45 KB
 4.4S, 19.9E - Empyrean Ruins Live.jpg 600 × 300; 34 KB
 4.5S, 23.5E - Merchant Tent Live.jpg 300 × 300; 25 KB
 4.6S, 25.7E - Skeleton Towers Live 2.jpg 400 × 400; 49 KB
 4.6S, 25.7E - Skeleton Towers Live.jpg 502 × 411; 38 KB
 4.8S, 2.9W - Peddler Tent Live.jpg 300 × 300; 25 KB
 40.0S, 54.9W - Tumerok Stronghold Live 2.jpg 400 × 182; 29 KB
 40.0S, 54.9W - Tumerok Stronghold Live 3.jpg 300 × 300; 37 KB
 40.0S, 54.9W - Tumerok Stronghold Live.jpg 655 × 333; 94 KB
 40.4S, 79.1E - Undead Encampment Live.jpg 400 × 300; 40 KB
 40.5N, 33.0E - Lumberjack's Camp Live.jpg 400 × 300; 31 KB
 40.5N, 78.2W - Tumerok Camp Live 2.jpg 300 × 300; 32 KB
 40.5N, 78.2W - Tumerok Camp Live.jpg 300 × 300; 30 KB
 40.6N, 12.5E - Lifestone Live.jpg 350 × 350; 38 KB
 40.6N, 41.6W - Windmills Live.jpg 300 × 300; 22 KB
 40.7S, 11.9E - Falatacot Temple Live 2.jpg 400 × 400; 20 KB
 40.7S, 11.9E - Falatacot Temple Live 3.jpg 400 × 400; 42 KB
 40.7S, 11.9E - Falatacot Temple Live.jpg 400 × 400; 26 KB
 40.8N, 35.8E - Standing Stones Live.jpg 400 × 300; 27 KB
 40.8N, 36.5E - Riverside Farm Live.jpg 400 × 300; 37 KB
 40.9N, 44.2E - Lifestone Building Live.jpg 300 × 300; 29 KB
 41.0N, 56.4E - Lost Wish Lovers House Live.jpg 600 × 300; 28 KB
 41.4N, 19.8W - Mite Bunker Live.jpg 300 × 300; 25 KB
 41.4N, 26.3E - Lich House Live 2.jpg 400 × 400; 41 KB
 41.4N, 26.3E - Lich House Live.jpg 300 × 300; 28 KB
 41.4N, 32.4E - Rocks and Ruins Live 2.jpg 400 × 300; 43 KB
 41.4N, 32.4E - Rocks and Ruins Live.jpg 400 × 300; 39 KB
 41.4N, 36.5E - Fisherman's Camp Live.jpg 300 × 300; 22 KB
 41.5N, 27.1E - Empyrean Three-legged Arch Live.jpg 300 × 300; 25 KB
 41.6S, 48.8W - Empyrean Stone Head Live 2.jpg 400 × 400; 49 KB
 41.6S, 48.8W - Empyrean Stone Head Live.jpg 400 × 400; 47 KB
 41.7N, 35.2E - Merchant's Hut Live.jpg 400 × 300; 29 KB
 41.8N, 34.9E - Wasp Bush Live.jpg 300 × 300; 26 KB
 41.8N, 35.1E - Statue Live.jpg 250 × 250; 18 KB
 41.8S, 7.2E - Inner Sea Pillars Live 2.jpg 400 × 400; 21 KB
 41.8S, 7.2E - Inner Sea Pillars Live.jpg 400 × 400; 22 KB
 41.9N, 34.9E - Statue Live.jpg 250 × 250; 22 KB
 42.0N, 34.9E - Statue Live.jpg 300 × 300; 24 KB
 42.0S, 56.2W - Tumerok Fort Live 2.jpg 400 × 400; 40 KB
 42.0S, 56.2W - Tumerok Fort Live.jpg 400 × 400; 47 KB
 42.1S, 63.8E - Banderling Camp Live 2.jpg 400 × 400; 44 KB
 42.1S, 63.8E - Banderling Camp Live.jpg 400 × 400; 39 KB
 42.2N, 34.6E - Apple Tree Live.jpg 250 × 250; 22 KB
 42.2N, 52.6E - Olthoi Rocks Live 2.jpg 400 × 400; 24 KB
 42.2N, 52.6E - Olthoi Rocks Live.jpg 400 × 400; 31 KB
 42.3N, 29.3E - Cave Live.jpg 400 × 300; 40 KB
 42.3N, 47.2W - Cottage Live 2.jpg 300 × 300; 21 KB
 42.3N, 47.2W - Cottage Live.jpg 300 × 300; 22 KB
 42.4N, 31.7E - Drudge Rocks Live.jpg 400 × 300; 34 KB
 42.4N, 32.2E - Healer and Peddler's House Live.jpg 400 × 300; 36 KB
 42.5S, 54.0E - Empyrean Fortress Tower Live 2.jpg 400 × 400; 31 KB
 42.5S, 54.0E - Empyrean Fortress Tower Live.jpg 400 × 400; 33 KB
 42.7N, 49.8E - Igloo Live 2.jpg 300 × 300; 22 KB
 42.7N, 49.8E - Igloo Live.jpg 300 × 300; 21 KB
 42.8N, 29.5E - Reformed Bandit's House Live.jpg 400 × 300; 40 KB
 42.9N, 42.3W - Plateau Watchtower Live.jpg 300 × 300; 23 KB
 42.9S, 30.5E - Villas Live.jpg 300 × 300; 25 KB
 43.1N, 33.6E - Stone Pillar Live.jpg 250 × 250; 16 KB
 43.2N, 35.9E - Ruins Live.jpg 400 × 300; 33 KB
 43.3N, 33.5E - Stone Pillar Live.jpg 250 × 250; 12 KB
 43.4N, 33.4E - Stone Pillar Live.jpg 200 × 200; 9 KB
 43.5N, 33.3E - Stone Pillar Live.jpg 250 × 250; 13 KB
 43.5N, 34.9E - Dock Live.jpg 400 × 300; 34 KB
 43.6N, 33.1E - Stone Pillar Live.jpg 250 × 250; 12 KB
 43.6S, 83.0W - Empyrean Ruins Live 2.jpg 400 × 400; 33 KB
 43.6S, 83.0W - Empyrean Ruins Live 3.jpg 400 × 400; 40 KB
 43.6S, 83.0W - Empyrean Ruins Live.jpg 400 × 400; 39 KB
 43.8N, 44.9W - Plateau Base Lifestone Live.jpg 250 × 250; 19 KB
 43.9N, 25.1E - Banderling Camp Live.jpg 400 × 300; 40 KB
 44.0N, 32.8E - Swamp Ruins Live.jpg 400 × 300; 31 KB
 44.1N, 5.5W - Villas Live.jpg 300 × 300; 26 KB
 44.2N, 37.0E - Drudge Hut Live.jpg 400 × 300; 37 KB
 44.2N, 39.4W - Villa Live 2.jpg 300 × 300; 20 KB
 44.2N, 39.4W - Villa Live.jpg 300 × 300; 23 KB
 44.2N, 63.1E - Mountain Defile Live 2.jpg 400 × 400; 14 KB
 44.2N, 63.1E - Mountain Defile Live.jpg 400 × 400; 14 KB
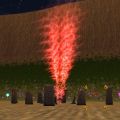
 44.2S, 25.2E - Flaming Pillar Live.jpg 400 × 400; 23 KB
 44.2S, 46.4W - Empyrean Stone Head Live 2.jpg 400 × 400; 42 KB
 44.2S, 46.4W - Empyrean Stone Head Live.jpg 400 × 400; 40 KB
 44.5S, 83.4W - Undead Sailor Bunker Live 2.jpg 400 × 400; 34 KB
 44.5S, 83.4W - Undead Sailor Bunker Live.jpg 300 × 300; 32 KB
 44.6N, 28.5W - Peddler's Hut Live.jpg 300 × 300; 22 KB
 44.7N, 80.9W - Menhir Ring 1 Live.jpg 695 × 412; 105 KB
 44.7N, 80.9W - Menhir Ring 2 Live.jpg 898 × 497; 78 KB
 44.7N, 80.9W - Menhir Ring 3 Live.jpg 508 × 266; 48 KB
 44.9N, 36.4E - Healer's House Live.jpg 400 × 300; 34 KB
 45.0N, 37.2E - Barn Live.jpg 400 × 300; 36 KB
 45.0N, 37.5E - Abandoned Hut Live.jpg 400 × 300; 31 KB
 45.2S, 39.1E - Undead Fort Live.jpg 597 × 340; 39 KB
 45.2S, 83.2W - Tumerok Fort Live 2.jpg 400 × 400; 53 KB
 45.2S, 83.2W - Tumerok Fort Live 3.jpg 400 × 400; 43 KB
 45.2S, 83.2W - Tumerok Fort Live.jpg 300 × 300; 40 KB
 45.3S, 61.1W - Menhir Ring Live.jpg 300 × 300; 29 KB
 45.6N, 11.6W - Igloo Live.jpg 400 × 400; 17 KB
 45.6N, 36.9E - Abandoned Hut Live.jpg 400 × 300; 37 KB
 45.6N, 37.3E - Banderling Cabbage Farm Live 2.jpg 300 × 400; 31 KB
 45.6N, 37.3E - Banderling Cabbage Farm Live.jpg 400 × 300; 32 KB
 45.6S, 71.3E - Cottages Live 2.jpg 300 × 300; 28 KB
 45.6S, 71.3E - Cottages Live.jpg 300 × 300; 21 KB
 45.6S, 87.0W - White Rabbit Cave Live 2.jpg 300 × 300; 26 KB
 45.6S, 87.0W - White Rabbit Cave Live.jpg 300 × 300; 25 KB
 46.0N, 44.6E - Collector's Hut Live.jpg 400 × 300; 37 KB
 46.0N, 8.0W - Archmage Lifestone Live 2.jpg 400 × 400; 49 KB
 46.0N, 8.0W - Archmage Lifestone Live.jpg 400 × 400; 39 KB
 46.2S, 71.8W - Menhir Ring Live.jpg 300 × 300; 28 KB
 46.3N, 60.3E - Cottage Live 2.jpg 300 × 300; 21 KB
 46.3N, 60.3E - Cottage Live.jpg 300 × 300; 19 KB
 46.5N, 36.9E - Empyrean Ruins Live.jpg 400 × 300; 41 KB
 46.5N, 48.6W - Cottages Live.jpg 300 × 300; 22 KB
 46.5N, 75.8W - Menhir Ring 1 Live.jpg 575 × 297; 51 KB
 46.5N, 75.8W - Menhir Ring 2 Live.jpg 1,127 × 585; 150 KB
 46.5N, 75.8W - Menhir Ring 3 Live.jpg 573 × 290; 55 KB
 46.9S, 29.4E - Villa 2 Live.jpg 300 × 300; 23 KB
 46.9S, 29.4E - Villa Live.jpg 300 × 300; 28 KB
 47.2N, 26.5W - Cottage Live 2.jpg 300 × 300; 21 KB
 47.2N, 26.5W - Cottage Live.jpg 300 × 300; 23 KB
 47.2N, 63.3E - Villas Live.jpg 300 × 300; 24 KB
 47.3S 76.6E - Creature Camps Live 2.jpg 300 × 300; 24 KB
 47.3S 76.6E - Creature Camps Live 3.jpg 300 × 300; 26 KB
 47.3S 76.6E - Creature Camps Live.jpg 300 × 400; 36 KB


